Ice Cream Cake with Oreo Crust
Introduction
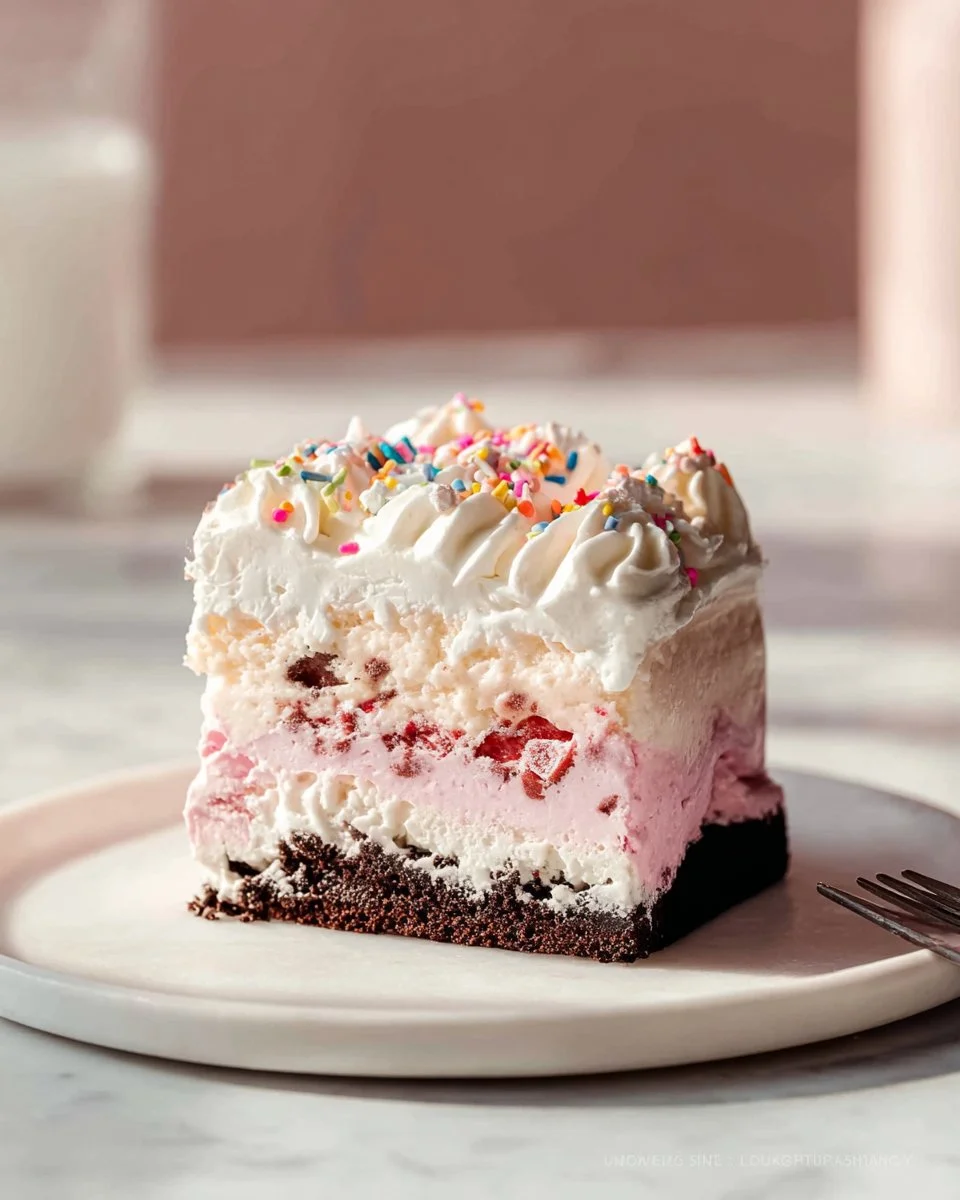
This Ice Cream Cake with Oreo Crust is a joyful, crowd-pleasing dessert that combines creamy chocolate and strawberry ice cream with a crunchy Oreo base and ribbons of hot fudge. The first bite gives you a cool, silky texture from the ice creams, a deep chocolate aroma from the fudge, and a satisfying snap from the Oreo crust. It tastes indulgent but familiar, like an upgraded summer treat for birthdays, pool parties, or any warm afternoon when you want something effortless and impressive. If you enjoy layered desserts, you might also like the warm spices in an apple cake recipe for cooler months, which pairs well with rich frostings in other baking projects apple spice cake with brown sugar frosting.
Ingredients
- 10 Oreo cookies (110g): Crushed to create the crunchy crust layer. Using classic Oreos adds both cookie and filling flavor.
- 2 Tablespoons (28g) unsalted butter, melted: Binds the crushed Oreos so the crust holds together.
- 1.5 quarts (1.42L) chocolate ice cream, softened: The bottom ice cream layer, softened so it spreads smoothly.
- 1 cup (8 ounces/227g) homemade hot fudge or store-bought, divided: Adds rich chocolate sauce between layers and for extra flavor.
- 1.5 quarts (1.42L) strawberry ice cream, softened: The top ice cream layer, softened for easy spreading and a bright fruity contrast.
- 2 cups (480ml) heavy cream, cold: Whipped into a stable topping for a light, creamy finish.
- 1/3 cup (40g) confectioners’ sugar: Sweetens and stabilizes the whipped cream.
- 1 and 1/2 teaspoons pure vanilla extract: Adds depth and rounds the whipped cream flavor.
- Sprinkles (optional for garnish): For a festive look and a little extra crunch.
Step-by-Step Instructions
- Make the Oreo crust. In a food processor, pulse the 10 Oreo cookies until you have a coarse crumb texture. In a bowl, mix the crushed Oreos with the melted butter until everything is evenly coated. Set this mixture aside. Tip: if you do not have a food processor, place cookies in a sealed bag and crush with a rolling pin.
- Prepare the pan and the chocolate layer. Line a 9×3-inch springform pan with plastic wrap so the cake will be easy to remove. Spread the softened chocolate ice cream in an even layer across the bottom of the prepared pan. Smooth with an offset spatula or the back of a spoon. Freeze for 30 minutes.
- Add hot fudge and the Oreo mixture. After 30 minutes, pour 1/2 cup of the hot fudge evenly over the chocolate ice cream layer. Sprinkle or press the Oreo mixture evenly on top of the hot fudge. Return the pan to the freezer and freeze for another 30 minutes.
- Add the strawberry layer. Soften the strawberry ice cream for about 10 minutes until spreadable. Spread the softened strawberry ice cream evenly over the chilled Oreo layer. Cover the top with plastic wrap and freeze the cake for at least 12 hours to fully set.
- Make the whipped cream topping. When you are ready to finish the cake, beat the cold heavy cream, confectioners’ sugar, and vanilla extract in a mixing bowl until stiff peaks form. Chill the whipped cream briefly if it starts to soften.
- Remove and frost the cake. Once the cake is fully frozen, carefully remove it from the springform pan using the plastic wrap to lift it out. Spread the whipped cream over the top and sides of the cake. If you like, decorate the top with sprinkles for color.
- Serve. Slice and serve immediately, or place the cake back in the freezer for up to 1 hour before serving to let slices firm up slightly for cleaner cuts.
Recipe Details
- Prep Time: 30 minutes active time, plus about 10 minutes to soften ice cream.
- Cook Time: 13 hours (includes 30 minutes freeze, another 30 minutes freeze, and at least 12 hours final freeze).
- Total Time: 13 hours 30 minutes.
- Servings: 12 slices.
- Calories: Approximately 530 calories per serving. This is an estimate and will vary by brand of ice cream and fudge.
Practical Tips, Storage & Variations
- Tips: Work quickly when spreading softened ice cream so layers stay even. Use an offset spatula chilled in cold water for smoother spreading.
- Storage: Wrap the cake tightly in plastic wrap and store in the freezer for up to 1 month. When ready to serve, transfer to the refrigerator for 10 to 15 minutes for easier slicing, or slice directly from the freezer with a warm, dry knife for cleaner cuts.
- Freezing advice: If transporting, keep the cake frozen in a cooler with ice packs to maintain firmness.
- Variations using only the listed ingredients: Swirl additional hot fudge between the chocolate and strawberry layers for more chocolate pockets. Use crushed Oreo crumbs on top of the whipped cream for extra texture, or sprinkle the whipped cream with the optional sprinkles for a colorful finish. For another dessert that highlights layered flavors and frosting techniques, see this caramel layer example caramel cake with caramel icing.
Step-by-step help and ingredient notes are available in other layered cake recipes if you want more techniques, such as using different crusts or frosting styles apple spice cake with brown sugar frosting. For an alternate presentation idea, you might adapt the concept into a frozen roll similar to a cream cheese frosted sponge roll carrot cake roll with cream cheese frosting. If you want different decoration inspiration, check layered cake finishes like chocolate ganache glazing chocolate orange layer cake with ganache.

FAQ
Q: Can I use different ice cream flavors?
A: Yes, you can swap or mix flavors, but keep the quantities the same so the layering works as written.
Q: How long should I soften the ice cream?
A: About 8 to 12 minutes at room temperature should make it spreadable without melting.
Q: Do I have to use a springform pan?
A: A springform pan is easiest for removal, but you can line a regular 9×3-inch cake pan with plastic wrap and lift the cake out the same way.
Q: Can I prepare this cake ahead of time?
A: Yes, prepare up to 1 month ahead and keep it tightly wrapped in the freezer.
Q: How do I get clean slices?
A: Use a sharp knife warmed under hot water and wiped dry between cuts.
People Also Ask
Q: What is the best way to soften ice cream for spreading?
A: Let it sit at room temperature for 8 to 12 minutes. Test by pressing a spoon into it; it should spread without pooling.
Q: Can I make the crust thicker?
A: Yes, press the Oreo mixture more firmly or reserve extra crumbs to add another layer on top of the whipped cream.
Q: Will the whipped cream hold up on a frozen cake?
A: Properly whipped and chilled cream holds well, but keep the cake cold until serving for the best texture.
Q: Can I use low-fat ice cream or light whipped topping?
A: You can, but textures and firmness may change. Light products often soften faster.
Q: How do I prevent freezer burn on leftover slices?
A: Wrap slices tightly in plastic wrap and place them in an airtight container or freezer bag before freezing.
Q: Is it possible to make individual servings?
A: Yes, layer the same ingredients in small ramekins or cups and freeze the same way.
Conclusion
This Ice Cream Cake with Oreo Crust is simple to assemble, comforting to eat, and perfect for celebrations or a special treat at home. If you enjoy seeing different takes on Oreo ice cream cakes, you might find useful inspiration in this detailed Oreo ice cream cake guide Oreo Ice Cream Cake – Girl Versus Dough. For another version with a cookie crust and similar layering, this recipe offers helpful tips and variations Ice Cream Cake with Oreo Cookie Crust – 3 Sisters Eat. Try the recipe, share photos, and enjoy every cold, creamy slice.
PrintIce Cream Cake with Oreo Crust

A delicious Ice Cream Cake featuring a crunchy Oreo crust layered with chocolate and strawberry ice cream, topped with whipped cream and optional sprinkles.
- Prep Time: 30 minutes
- Cook Time: 810 minutes
- Total Time: 840 minutes
- Yield: 12 slices 1x
- Category: Dessert
- Method: Freezing
- Cuisine: American
- Diet: Vegetarian
Ingredients
- 10 Oreo cookies (110g), crushed
- 2 Tablespoons (28g) unsalted butter, melted
- 1.5 quarts (1.42L) chocolate ice cream, softened
- 1 cup (8 ounces/227g) homemade hot fudge or store-bought, divided
- 1.5 quarts (1.42L) strawberry ice cream, softened
- 2 cups (480ml) heavy cream, cold
- 1/3 cup (40g) confectioners’ sugar
- 1 and 1/2 teaspoons pure vanilla extract
- Sprinkles (optional for garnish)
Instructions
- Make the Oreo crust. In a food processor, pulse the 10 Oreo cookies until you have a coarse crumb texture. In a bowl, mix the crushed Oreos with the melted butter until everything is evenly coated. Set this mixture aside.
- Prepare the pan and the chocolate layer. Line a 9×3-inch springform pan with plastic wrap. Spread the softened chocolate ice cream in an even layer across the bottom of the prepared pan. Freeze for 30 minutes.
- Add hot fudge and the Oreo mixture. After 30 minutes, pour 1/2 cup of the hot fudge evenly over the chocolate ice cream layer. Sprinkle or press the Oreo mixture evenly on top of the hot fudge. Return the pan to the freezer and freeze for another 30 minutes.
- Add the strawberry layer. Soften the strawberry ice cream for about 10 minutes until spreadable. Spread the softened strawberry ice cream evenly over the chilled Oreo layer. Cover the top with plastic wrap and freeze the cake for at least 12 hours to fully set.
- Make the whipped cream topping. Beat the cold heavy cream, confectioners’ sugar, and vanilla extract in a mixing bowl until stiff peaks form.
- Remove and frost the cake. Carefully remove the cake from the springform pan using the plastic wrap. Spread the whipped cream over the top and sides of the cake. If you like, decorate the top with sprinkles.
- Serve. Slice and serve immediately, or place the cake back in the freezer for up to 1 hour before serving to let slices firm up slightly.
Notes
Work quickly when spreading softened ice cream to maintain even layers. Store wrapped tightly in the freezer for up to 1 month.
Nutrition
- Serving Size: 1 slice
- Calories: 530
- Sugar: 40g
- Sodium: 150mg
- Fat: 30g
- Saturated Fat: 18g
- Unsaturated Fat: 12g
- Trans Fat: 0g
- Carbohydrates: 55g
- Fiber: 1g
- Protein: 5g
- Cholesterol: 75mg