
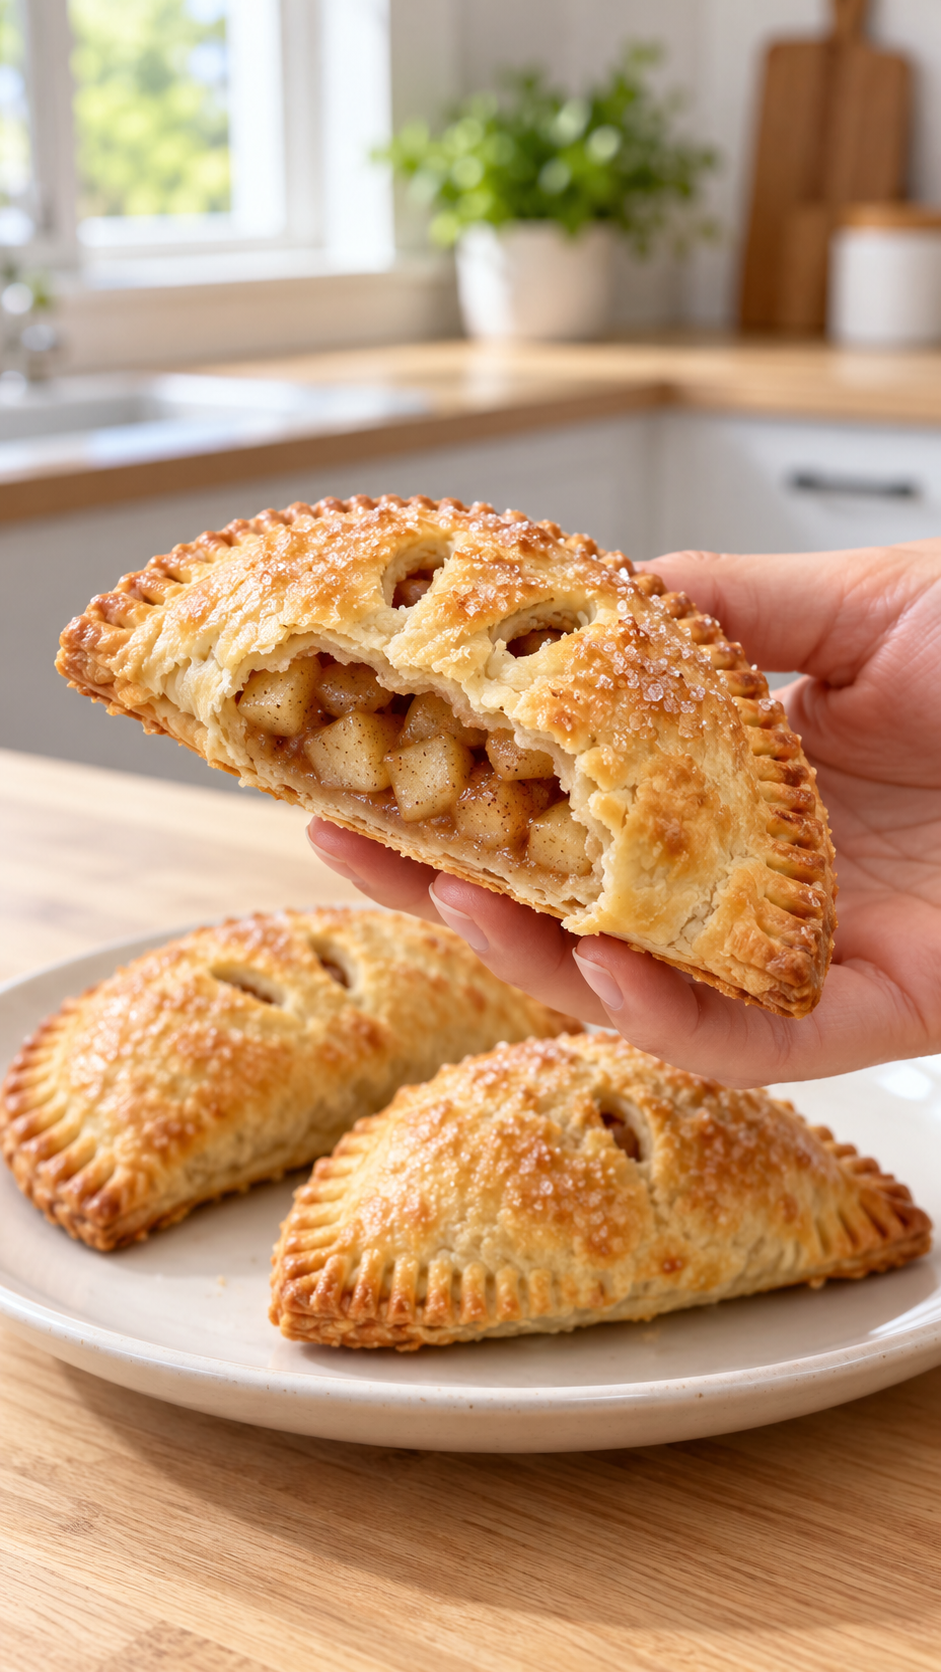
These gluten-free apple hand pies use folded butter pastry around a cooked apple filling. The half-moon shape gives every serving a sealed border, a golden surface and a generous proportion of crust. Cutting one after it has cooled enough to handle reveals the apples without a rush of liquid.
Cool the filling before assembly
Cooking the apples first lets you control their tenderness and thicken the released juices. Dice them fairly evenly so they soften at the same pace. Spread the finished filling in a shallow dish to cool. Warm filling can soften the butter in the pastry before the pies reach the oven.
Fold the dough without warming it
The three letter folds spread the butter into layers. Keep the work surface lightly floured and stop to chill the dough if it becomes sticky or greasy. Water needs vary between flour blends: add it gradually and look for hydrated flour that holds together when pressed, rather than a wet paste.
Seal first, then add the vents
Leave a clean border around the filling. Egg wash helps the folded edges meet, and a light fork crimp reinforces the seal. Cut the top vents after the assembled pies are firm. The freezer rest and fresh baking tray help the pastry start baking before the butter has time to run out.
Gluten-free ingredient checks
Weigh the flour and use a plain gluten-free blend rather than swapping in a single nut or coconut flour. Omit the listed xanthan only where the ingredient line says to do so. Check the labels on baking powder, chocolate, spices and other packaged ingredients, and use clean tools and surfaces to avoid cross-contact.
For label guidance, read the FDA explanation of gluten-free food labeling. Contains: Egg and milk; check the flour blend.
Serving and storage
Best on baking day. Keep cooled leftovers covered in a cool place for up to 2 days; refrigerate in a warm kitchen.
For another baking project, try our gluten-free pumpkin roll, or browse the DayTasty recipe collection.

Gluten-Free Apple Hand Pies
Ingredients
Method
- Cook butter, apples, brown sugar, lemon juice and cinnamon in a covered saucepan over medium heat for 5–6 minutes, until fork-tender. Stir in the cornstarch slurry and cook, stirring, about 1 minute until the juices thicken. Spread in a shallow dish and cool completely.
- Combine the pastry flour, sugar, xanthan and salt. Work in the cold butter, leaving large pieces about the size of walnut halves. Add cold water gradually while tossing, just until all the flour is damp and the dough can be pressed together. Wrap and refrigerate 20–30 minutes.
- Roll on a floured surface into a long rectangle about 1/4 inch thick. Fold in thirds like a letter, rotate a quarter turn and roll again. Repeat until you have made three letter folds in total. Wrap and chill another 20–30 minutes.
- Roll the chilled pastry to 1/8 inch / 2–3 mm thick. Cut 5–5 1/4-inch circles, stacking and rerolling scraps to make 9–10. Place 1 1/2–2 tbsp cold filling on half of each circle, leaving a 1/2-inch border. Brush the border with egg, fold over, seal and crimp with a fork.
- Freeze the covered assembled pies at least 15 minutes, until firm. Heat a conventional oven to 400°F / 200°C. Move to a fresh lined tray, add two vents to each pie, brush with egg and sprinkle with sugar.
- Bake 25–30 minutes, until deeply golden. Rest 5 minutes on the tray, then cool on a rack. The filling is hot immediately after baking; serve warm or at room temperature.
Notes
Best on baking day. Keep cooled leftovers covered in a cool place for up to 2 days; refrigerate in a warm kitchen.
Contains: Egg and milk; check the flour blend.
Weigh flour. Check labels and prevent gluten cross-contact.