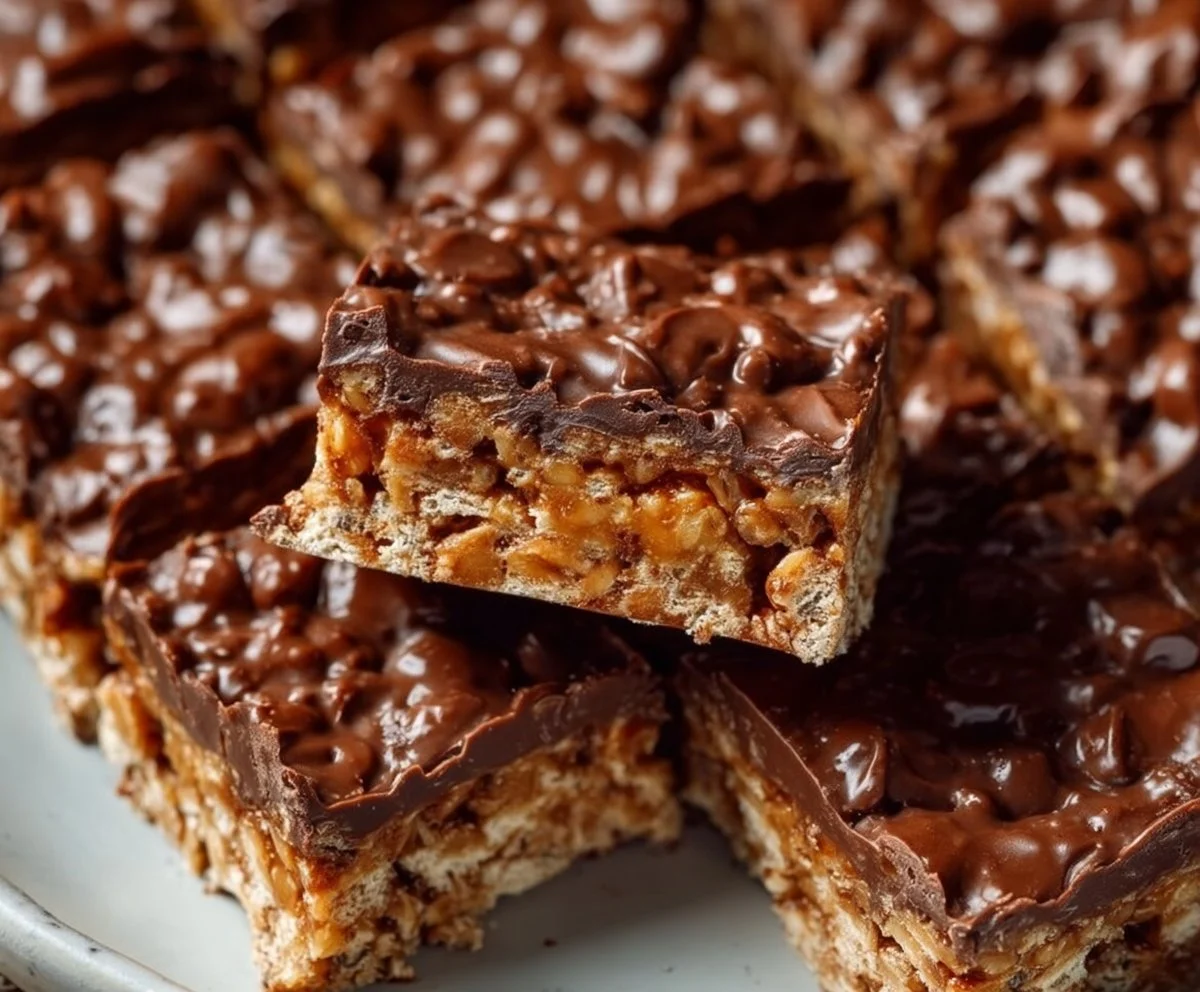
No-Bake Chocolate Peanut Butter Crunch Bars: A Family Favorite Treat
There’s something undeniably delightful about a sweet treat that requires minimal effort, and these No-Bake Chocolate Peanut Butter Crunch Bars fit the bill perfectly! With layers of creamy peanut butter, rich chocolate, and a satisfying crunch, this family-friendly dessert is sure to earn a place in your recipe rotation. Just mix, layer, chill, and enjoy; it’s as simple as that! Are you ready to create a delicious dessert that your loved ones will rave about?
What Is No-Bake Chocolate Peanut Butter Crunch Bars?
No-Bake Chocolate Peanut Butter Crunch Bars are a sweet, indulgent treat combining creamy peanut butter, chocolate, and crunchy cereal, all without the need for an oven. This dish stands out because it’s quick and easy to make, perfect for busy families or anyone craving a sweet snack. The combination of textures—creamy, crunchy, and chewy—creates a flavor explosion that’ll leave you coming back for more. Ideal for picnics, after-school snacks, or movie nights, they bring joy to any occasion!
Why You’ll Love This No-Bake Chocolate Peanut Butter Crunch Bars
- Convenient: No baking means less time spent in the kitchen and more time enjoying delicious treats.
- Flavorful: The rich combination of chocolate and peanut butter is a classic that never disappoints.
- Customizable: Add your favorite toppings or substitute ingredients to suit your taste preferences.
- Budget-Friendly: Made with simple ingredients often found in your pantry, these bars are easy on the wallet.
- Fun to Make: Kids can join in on the fun, making it a fantastic family activity!
How to Make No-Bake Chocolate Peanut Butter Crunch Bars
Quick Overview
Making No-Bake Chocolate Peanut Butter Crunch Bars is a breeze. With just a handful of ingredients and a quick chilling time, you’ll have a delectable dessert ready to share with your family.
Ingredients
- 1 cup creamy peanut butter (smooth works best)
- ½ cup honey or maple syrup (for sweetness and binding)
- 3 cups rice cereal (or any crunchy cereal for added texture)
- 1 cup semi-sweet chocolate chips (for melting and drizzling)
- ½ teaspoon vanilla extract (for flavor enhancement)
Directions
- Prepare Your Dish: Line an 8×8 inch square baking dish with parchment paper or lightly grease it for easy removal.
- Combine Base Ingredients: In a medium saucepan over low heat, combine the peanut butter and honey (or maple syrup). Stir until melted and smooth.
- Add Cereal: Remove the saucepan from heat and quickly fold in the rice cereal until fully coated with the peanut butter mixture.
- Spread the Mixture: Transfer the mixture to the prepared baking dish, pressing down evenly with a spatula to create a firm layer.
- Melt the Chocolate: In a microwave-safe bowl, melt the chocolate chips in 30-second intervals, stirring in between, until smooth.
- Top with Chocolate: Pour the melted chocolate over the cereal mixture, spreading it evenly with a spatula.
- Chill and Set: Refrigerate for at least 2 hours or until firm. Once set, lift the bars out of the dish and cut them into squares.
What to Serve With No-Bake Chocolate Peanut Butter Crunch Bars
- Ice Cream: Serve alongside a scoop of vanilla or chocolate for a delightful dessert combo.
- Fruit: Pair with fresh strawberries or banana slices to balance the sweetness.
- Milk or Nut Milk: Enjoy with a glass of cold milk for a classic pairing.
- Coffee or Tea: Great for an afternoon treat or a sweet pick-me-up during snack time.
- Special Occasions: Perfect for birthday parties, playdates, or potlucks.
Top Tips for Perfecting No-Bake Chocolate Peanut Butter Crunch Bars
- Substitutions: Swap out peanut butter for almond or sun butter for a different flavor profile or dietary accommodations.
- Texture Adjustments: For extra crunch, mix in chopped nuts or seeds.
- Storage: Store in an airtight container in the refrigerator for up to one week.
- Equipment: Use a spatula to pack the mixture tightly in the baking dish for firmer bars.
- Make Ahead: Feel free to prepare them ahead of time and keep them in the fridge until ready to enjoy.
Storing and Reheating Tips
- Refrigeration: Keep the bars in the fridge to maintain firmness. They will hold up well for about a week.
- Freezing: These bars can be frozen for up to three months. Just wrap them individually in plastic wrap and store in an airtight container.
- Reheating: If you prefer a warm treat, pop them in the microwave for a few seconds to soften them, but be careful not to overheat.
FAQs
- Can I use crunchy peanut butter? Absolutely! Crunchy peanut butter will add an extra layer of texture.
- Are there any spice adjustments? For an added kick, you can sprinkle in some cinnamon or a dash of sea salt on top before chilling.
- Can I prep these bars ahead of time? Yes, these bars can be made a day or two in advance and stored in the refrigerator.
- What if I’m gluten-free? Use gluten-free rice cereal or other gluten-free cereal options.
- How can I make them more chocolatey? You can mix mini chocolate chips into the base or add a layer of chocolate ganache on top!
Conclusion
Once you bite into these No-Bake Chocolate Peanut Butter Crunch Bars, you’ll understand why they’re a family favorite! Their delectable combination of flavors and textures makes them the perfect treat for any occasion. Try it tonight and let me know how it turned out!
No-Bake Chocolate Peanut Butter Crunch Bars
Delight in these easy No-Bake Chocolate Peanut Butter Crunch Bars, featuring creamy peanut butter, rich chocolate, and a satisfying crunch.
- Prep Time: 15 minutes
- Cook Time: 0 minutes
- Total Time: 120 minutes
- Yield: 16 servings 1x
- Category: Dessert
- Method: No-Bake
- Cuisine: American
- Diet: Vegan
Ingredients
- 1 cup creamy peanut butter
- ½ cup honey or maple syrup
- 3 cups rice cereal
- 1 cup semi-sweet chocolate chips
- ½ teaspoon vanilla extract
Instructions
- Line an 8×8 inch square baking dish with parchment paper or lightly grease it.
- In a medium saucepan over low heat, combine the peanut butter and honey (or maple syrup) until melted and smooth.
- Remove from heat and fold in the rice cereal until fully coated.
- Transfer the mixture to the prepared baking dish and press down evenly.
- Melt the chocolate chips in a microwave-safe bowl in 30-second intervals until smooth.
- Pour the melted chocolate over the cereal mixture and spread evenly.
- Refrigerate for at least 2 hours or until firm, then cut into squares.
Notes
Store in an airtight container in the refrigerator for up to one week. Can be frozen for up to three months.
Nutrition
- Serving Size: 1 bar
- Calories: 120
- Sugar: 8g
- Sodium: 100mg
- Fat: 7g
- Saturated Fat: 2g
- Unsaturated Fat: 5g
- Trans Fat: 0g
- Carbohydrates: 12g
- Fiber: 1g
- Protein: 4g
- Cholesterol: 0mg