Homemade Granola Bars
Welcome to your future favorite recipe: Homemade Granola Bars! These delightful, chewy treats are a fantastic blend of wholesome ingredients, making them a nutritious and satisfying snack for both kids and adults. The warm aroma of baked oats and honey fills your kitchen while they cook, creating a cozy atmosphere that’s hard to resist. Packed with flavor and tender in texture, these bars are easy to customize and perfect for a variety of occasions. You’ll want to give this recipe a try!
What Is Homemade Granola Bars?
Homemade granola bars are portable snack bars made primarily from oats, nuts, and sweeteners such as honey or maple syrup. Unlike store-bought versions, which can contain preservatives and excess sugar, homemade granola bars allow you to control the ingredients and tailor them to your family’s taste preferences. Whether you’re looking for a quick breakfast on the go or a wholesome afternoon snack, these bars can be a delightful addition to your meal plan.
Why You’ll Love This Homemade Granola Bars
- Easy to make: With minimal prep time and simple techniques, these bars are a breeze to whip up.
- Flavor-packed: Customize with your favorite mix-ins, like dried fruits, nuts, or chocolate chips.
- Family-friendly: A hit with both kids and adults makes snack time enjoyable for everyone.
- Budget-friendly: Save money by making your own bars rather than purchasing expensive store-bought ones.
- Healthy fats and whole grains: Thanks to nuts and oats, you’ll provide your family with nourishing ingredients.
How to Make Homemade Granola Bars
Quick Overview
These homemade granola bars come together in just a few simple steps, making them an easy choice for a nutritious snack. With a combination of oats, nut butter, and honey, you can whip up a batch that’s perfectly chewy and satisfying.
Ingredients
- 2 cups rolled oats: Choose gluten-free oats for a gluten-free option.
- 1 cup nut butter (like almond or peanut): This provides moisture and flavor.
- 1/2 cup honey or maple syrup: Serve as your natural sweetener.
- 1/2 cup chopped nuts: Walnuts, almonds, or pecans work great.
- 1/2 cup dried fruit: Raisins, cranberries, or apricots add a touch of sweetness.
- 1/4 cup mini chocolate chips (optional): For a sweet twist!
Directions
- Preheat your oven to 350°F (175°C) and line a baking pan (approximately 9×9”) with parchment paper.
- In a large bowl, combine the rolled oats, nut butter, honey, chopped nuts, and dried fruit until well combined.
- Transfer the mixture to the prepared baking pan and press it down firmly to create an even layer.
- Bake in the preheated oven for 20-25 minutes, or until the edges are golden brown.
- Remove from the oven and let cool in the pan for about 10 minutes before lifting out using the parchment paper.
- Cut into bars once cooled completely, and enjoy!
- Store in an airtight container for up to one week.
What to Serve With Homemade Granola Bars
- Yogurt and fresh berries: A great breakfast or snack to pair with your granola bars.
- Smoothies: Perfect for a quick on-the-go bite.
- Nut milk or dairy milk: A refreshing drink alongside your bars.
- Healthy dips: Greek yogurt or peanut butter for added dip options.
- Picnics and lunchboxes: Great for outdoor gatherings or packed lunches.
Top Tips for Perfecting Homemade Granola Bars
- Mix-ins galore: Feel free to swap out nuts or fruits based on your preference or what you have at home.
- For added crunch: Lightly toast the oats and nuts in the oven before mixing to enhance flavor.
- Storage: Keep them in an airtight container to maintain freshness; they can also be frozen for up to three months.
- Experiment with spices: A pinch of cinnamon or vanilla can elevate the flavor profile.
- Use a sturdy baking dish: This will help your bars hold their shape when cut.
Storing and Reheating Tips
- Refrigeration: Store your granola bars in the fridge for a firmer texture.
- Reheating: If you prefer them warm, microwave for 10-15 seconds.
- Freezing: Wrap each bar in parchment paper and freeze individually for a quick snack option later on.
FAQs
- Can I use a different nut butter? Yes! Sunflower seed butter is a great nut-free option.
- How can I adjust the sweetness? Reduce the honey or maple syrup by 1–2 tablespoons if you prefer less sweetness.
- Can I prep these ahead of time? Absolutely! They keep well, making them perfect for meal prep.
- What if I don’t have honey? Agave syrup or even a sugar substitute can work as alternatives.
- How long do they last? When stored properly, they’ll remain fresh for a week at room temperature.
Conclusion
These homemade granola bars are a wonderful way to provide your family with a delicious and nutritious snack option. Easy to make and packed with flavor, they’re sure to become a staple in your home. Try it tonight and let me know how it turned out!
Homemade Granola Bars
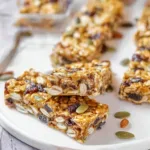
Delightful and chewy homemade granola bars made with wholesome ingredients, perfect for snacks or breakfast.
- Prep Time: 10 minutes
- Cook Time: 25 minutes
- Total Time: 35 minutes
- Yield: 12 servings 1x
- Category: Snack
- Method: Baking
- Cuisine: American
- Diet: Vegetarian
Ingredients
- 2 cups rolled oats
- 1 cup nut butter (like almond or peanut)
- 1/2 cup honey or maple syrup
- 1/2 cup chopped nuts
- 1/2 cup dried fruit
- 1/4 cup mini chocolate chips (optional)
Instructions
- Preheat your oven to 350°F (175°C) and line a baking pan (approximately 9×9”) with parchment paper.
- In a large bowl, combine the rolled oats, nut butter, honey, chopped nuts, and dried fruit until well combined.
- Transfer the mixture to the prepared baking pan and press it down firmly to create an even layer.
- Bake in the preheated oven for 20-25 minutes, or until the edges are golden brown.
- Remove from the oven and let cool in the pan for about 10 minutes before lifting out using the parchment paper.
- Cut into bars once cooled completely, and enjoy!
Notes
Store in an airtight container for up to one week. Can be frozen for up to three months.
Nutrition
- Serving Size: 1 bar
- Calories: 200
- Sugar: 10g
- Sodium: 50mg
- Fat: 10g
- Saturated Fat: 1g
- Unsaturated Fat: 9g
- Trans Fat: 0g
- Carbohydrates: 25g
- Fiber: 3g
- Protein: 5g
- Cholesterol: 0mg