There’s something truly magical about pulling a tray of freshly baked Fluffy Russian Piroshki out of the oven. The intoxicating aroma of warm bread filled with savory or sweet fillings wafts through the air, welcoming everyone to the kitchen. These delightful pastries, with their golden-brown crust and pillowy soft interiors, are perfect little pockets of joy. Whether you’re hosting a gathering, preparing a delightful family meal, or just craving a bite of comfort food, Piroshki hits all the right notes. They’re incredibly easy to make, packed with flavor, and can even be customized to fit your family’s preferences. So why not give this recipe a go and enjoy the deliciousness that is Fluffy Russian Piroshki?
Understanding Fluffy Russian Piroshki
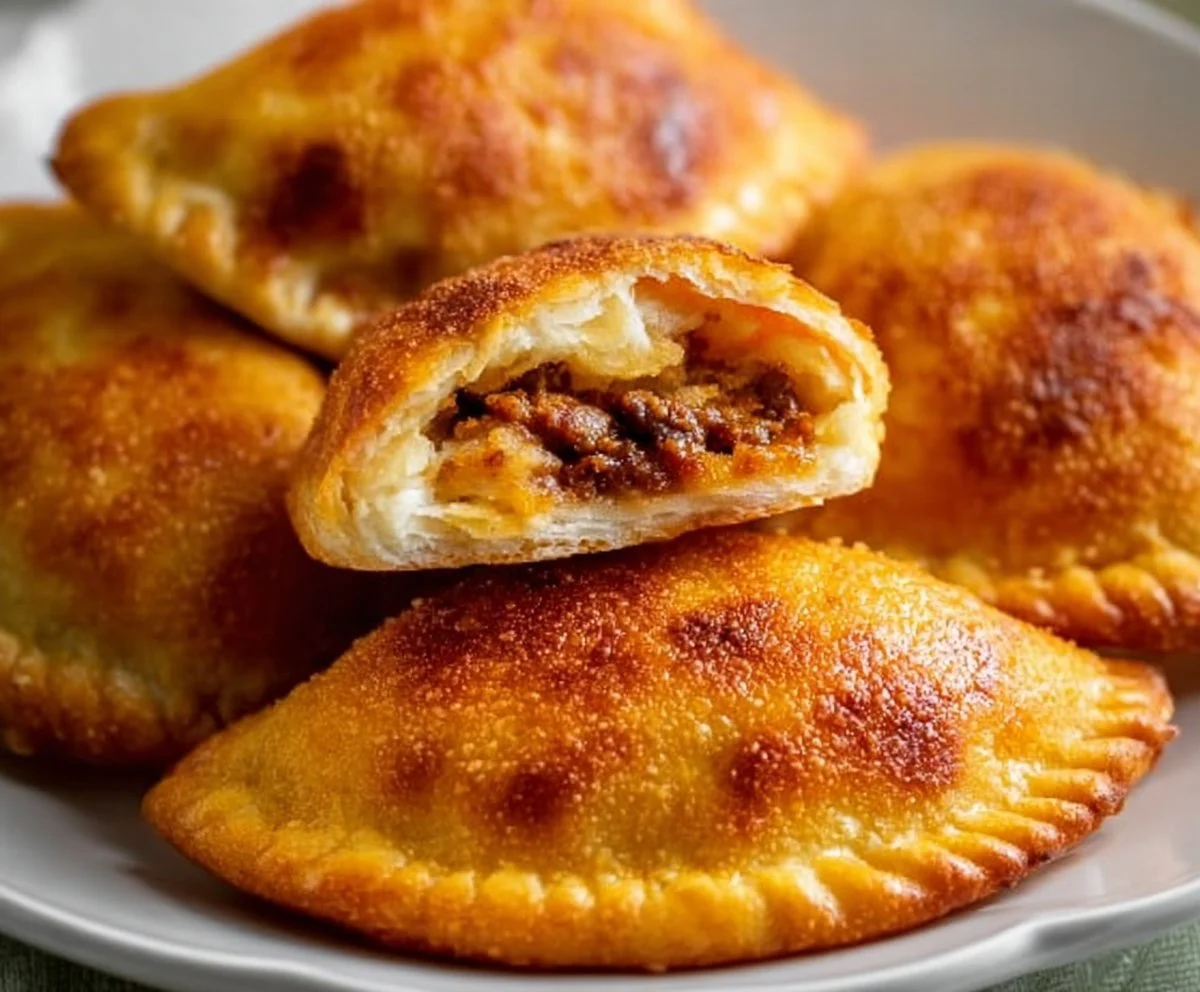
Piroshki (singular: Piroshok) has been a staple in Russian cuisine for centuries, originating from the humble kitchens of Eastern Europe. Traditionally, these delightful treats are filled with various ingredients, ranging from meats and vegetables to sweet fruits and jam. The dough is usually unleavened, yet our recipe here offers a fluffy, light texture that’s achieved with yeast and a touch of dedication. This modern adaptation not only respects the traditional flavors but enhances them through easy cooking techniques. Serving them warm is essential; it amplifies the freshness and allows the fillings to shine—whether that be a rich sautéed cabbage or a sweet cherry filling bursting with flavor.
What can elevate this experience even further is the use of an air fryer or a slow cooker. By employing these methods, you can savor the crisp texture of fried Piroshki while enjoying healthier, lower-fat versions. The slow cooking not only melds the flavors within the filling but also creates a beautifully soft, fluffy dough. These treats can be served at various occasions: from family dinners to festive gatherings, they always leave a memorable impression. Fun fact—Piroshki means “small pie” in Russian, and there’s nothing small about the love they bring to the table.
Why You’ll Love This Fluffy Russian Piroshki
This recipe for Fluffy Russian Piroshki blends simplicity with incredible flavor, making it a perfect addition to your recipe repertoire.
Ease of preparation: With straightforward steps, even beginner cooks can master this dish. The dough comes together easily, and the fillings can be prepared while it rises.
Flavor complexity: Each bite offers layers of flavor—rich fillings, the subtle sweetness of yeast dough, and that golden, crispy crust that you’re bound to crave again and again.
Family-friendly or kid-approved: Kids love the fun of choosing their fillings and the excitement of biting into a delicious, fluffy parcel. It’s a hands-on project that can unite the family in the kitchen.
Budget-friendly or ingredient flexibility: Using staples such as flour, yeast, and basic fillings means this is a budget-conscious dish. You can easily switch things up with whatever ingredients you have on hand!
How to Make Fluffy Russian Piroshki
Making Fluffy Russian Piroshki is straightforward and fulfilling, making this a wonderful project for your kitchen.
Get ready to explore delightful aromas and textures over the course of about 2 hours from start to finish—not including the filling prep! You’ll need simple kitchen tools like a mixing bowl, a baking tray, and parchment paper. Here’s a quick look at what you’ll need and how to create these delectable pockets of flavor.
Ingredients
4 cups all-purpose flour: This forms the base for the dough, ensuring a light and fluffy texture. Optional: use bread flour for a slightly chewier bite.
1 packet (2 ¼ tsp) active dry yeast: This is crucial for leavening the dough, allowing it to rise and create that fluffy texture.
1 cup warm milk (about 110°F): The warmth activates the yeast, creating a lovely airy dough. Whole milk is ideal, but alternatives like almond milk can be used.
2 tablespoons sugar: Adds a hint of sweetness and helps feed the yeast for a better rise.
1 teaspoon salt: Balances flavor and tightens the dough.
2 large eggs: Adds richness and nutrition to the dough.
4 tablespoons unsalted butter (melted): This keeps the dough moist and adds richness.
Filling of your choice: Options include sautéed mushrooms, ground beef, potato, or fruit preserves for a sweet option.
Directions
Prepare the yeast: In a small bowl, mix the warm milk, sugar, and yeast. Let it sit for about 5-10 minutes until foamy. This step is crucial because it ensures that the yeast is active.
Make the dough: In a large mixing bowl, combine flour and salt. Make a well in the center; add the foamy yeast mixture, eggs, and melted butter. Mix until a shaggy dough forms.
Knead the dough: Transfer the mixture to a lightly floured surface and knead for about 10 minutes, until smooth and elastic. The dough should feel soft yet not sticky. If it sticks, add a little more flour as needed.
Let it rise: Place the dough in a greased bowl, cover it with a damp cloth, and let it rise in a warm area for about 1 hour or until doubled in size. The dough should feel airy and light after rising.
Form the piroshki: Punch down the dough gently to release the air bubbles. Divide into 12-16 equal portions, and roll each into a small ball. Flatten each ball into a disk and place about 1 tablespoon of filling in the center. Pinch the edges together to form a sealed packet.
Second rise: Place shaped Piroshki on a lined baking tray. Cover with a damp towel and let rise for another 30 minutes. This helps them puff up during baking.
Bake: Preheat the oven to 375°F (190°C). Bake the Piroshki for 20-25 minutes or until golden brown. The aroma will fill your kitchen as they bake, and you can expect a fantastic cardamom-perfumed treat.
What to Serve With Fluffy Russian Piroshki
Fluffy Russian Piroshki can be a wonderful centerpiece dish, but they are remarkably versatile in terms of pairings.
Consider serving these pastries alongside a fresh green salad to balance the hearty nature of the Piroshki. A lightly dressed vinaigrette will complement the rich filling well. Additionally, a simple bowl of borscht or a creamy mushroom soup would create a comforting meal that embraces the cozy, hearty flavors typical in Russian cuisine. For something sweeter, serve with light whipped cream or a fruit compote for a delightful dessert finish.
Top Tips for Perfecting Fluffy Russian Piroshki
With a few simple tips, you can elevate your Fluffy Russian Piroshki to new heights.
Ingredient swaps or upgrades: Consider using whole wheat flour for a healthier take or adding spices like dill or cumin to the dough for extra flavor.
Spice adjustments: If you’re using savory fillings, consider adding herbs or spices to enhance the taste, such as garlic powder or smoked paprika.
Equipment advice: If you want to save time, you can use a stand mixer with a dough hook to knead. However, hand kneading is an excellent way to connect with your food.
Storage tips: Store leftovers in an airtight container in the refrigerator for up to 3 days. They can be reheated in an oven to retain a crispy exterior.
Mistakes to avoid: Ensure your yeast is fresh before using; if it doesn’t foam in step one, it may be dead, leading to flat pastries.
Variations & Add-Ins
While Piroshki is delicious in its traditional form, there are endless possibilities for flavors and fillings.
Sweet Piroshki: Use sweetened cream cheese or a spiced apple filling. Mix fresh apples with sugar, cinnamon, and a bit of lemon juice for brightness.
Vegetarian Version: Swap meats for a filling of roasted vegetables and cheese for creamy goodness. Mushrooms and spinach make a delicious combination when mixed with ricotta.
Spiced Meat Fillings: Experiment with different meats and spices, such as Moroccan spices or Italian sausage with peppers.
This adaptability makes Fluffy Russian Piroshki a dish that can cater to various tastes and preferences, ensuring everyone at the table is satisfied.
Kid-Friendly Version
To create kid-friendly Fluffy Russian Piroshki, consider using simpler fillings that appeal to younger palates. Try sweetened fruit preserves or a classic cheese blend, perhaps with a bit of mild cheddar. You can also invite kids to help shape the Piroshki; it makes for a fun family activity. You can shape them into fun animal or heart shapes to spark excitement and engagement.
Storing and Reheating Tips
When it comes to storing your Fluffy Russian Piroshki, proper care can prolong their deliciousness. Allow them to cool completely after baking before transferring them to an airtight container. For optimal freshness, place parchment paper between layers to prevent sogginess. These beauties can be stored in the refrigerator for up to three days or in the freezer for up to three months, ensuring that the joy of homemade Piroshki can be enjoyed whenever you wish.
Reheating your Piroshki is key to regaining their original texture. Preheat your oven to 350°F (175°C) and place the Piroshki on a baking sheet, covering them loosely with aluminum foil to prevent them from getting too brown. Warm for about 10-15 minutes until heated through and the crust is crispy. If you’re using a microwave, do so around 30 seconds at a time, but be aware that this method may not retain the crispiness.
FAQs
Q1: Can I prepare the dough ahead of time?
Absolutely! You can prepare the dough and refrigerate it overnight for more developed flavors. Just allow it to rest at room temperature for about 30 minutes before shaping.
Q2: Can I use gluten-free flour?
Yes! There are many excellent gluten-free flour blends available. Just note, the texture may differ slightly, and you might need to adjust the liquid amounts.
Q3: How long can I freeze Fluffy Russian Piroshki?
They can last up to three months in the freezer. Make sure to wrap each Piroshok individually in plastic wrap before storing in an airtight container.
Q4: How can I adjust the sweetness of the fillings?
Feel free to adjust the sugar in the filling to taste. For instance, if you prefer a tart bite, use fresh fruit but reduce the sugar.
Q5: What is the ideal rise time for the dough?
Typically, allowing 1-1.5 hours for the first rise is perfect. However, this may vary based on the warmth of your kitchen.
Conclusion
Fluffy Russian Piroshki is more than just a meal; they are a cherished family tradition that brings comfort and joy. This recipe is perfect for those looking to create hearty, flavorful treats filled with love and deliciousness. No matter the occasion, these fluffy delights are bound to be a hit. So, gather your ingredients and family, and embark on this delightful cooking journey. Try it tonight and let me know how it turned out!
PrintFluffy Russian Piroshki

A delightful recipe for Fluffy Russian Piroshki, warm pastries filled with savory or sweet fillings, perfect for family gatherings.
- Prep Time: 120 minutes
- Cook Time: 25 minutes
- Total Time: 145 minutes
- Yield: 12 servings 1x
- Category: Snack
- Method: Baking
- Cuisine: Russian
- Diet: Vegetarian
Ingredients
- 4 cups all-purpose flour
- 1 packet (2 ¼ tsp) active dry yeast
- 1 cup warm milk (about 110°F)
- 2 tablespoons sugar
- 1 teaspoon salt
- 2 large eggs
- 4 tablespoons unsalted butter (melted)
- Filling of your choice (sautéed mushrooms, ground beef, potato, or fruit preserves)
Instructions
- Prepare the yeast: In a small bowl, mix warm milk, sugar, and yeast. Let it sit for 5-10 minutes until foamy.
- Make the dough: In a large mixing bowl, combine flour and salt. Make a well in the center; add the foamy yeast mixture, eggs, and melted butter. Mix until a shaggy dough forms.
- Knead the dough: Transfer the mixture to a lightly floured surface and knead for about 10 minutes, until smooth and elastic.
- Let it rise: Place the dough in a greased bowl, cover with a damp cloth, and let it rise for about 1 hour or until doubled in size.
- Form the piroshki: Punch down the dough gently, divide into 12-16 equal portions, and fill each with about 1 tablespoon of chosen filling. Pinch the edges to seal.
- Second rise: Place shaped piroshki on a lined baking tray, cover, and let rise for another 30 minutes.
- Bake: Preheat the oven to 375°F (190°C) and bake for 20-25 minutes or until golden brown.
Notes
For best results, serve warm. You can use an air fryer or slow cooker for a healthier version.
Nutrition
- Serving Size: 1 pastry
- Calories: 220
- Sugar: 2g
- Sodium: 300mg
- Fat: 9g
- Saturated Fat: 4g
- Unsaturated Fat: 3g
- Trans Fat: 0g
- Carbohydrates: 29g
- Fiber: 1g
- Protein: 6g
- Cholesterol: 55mg