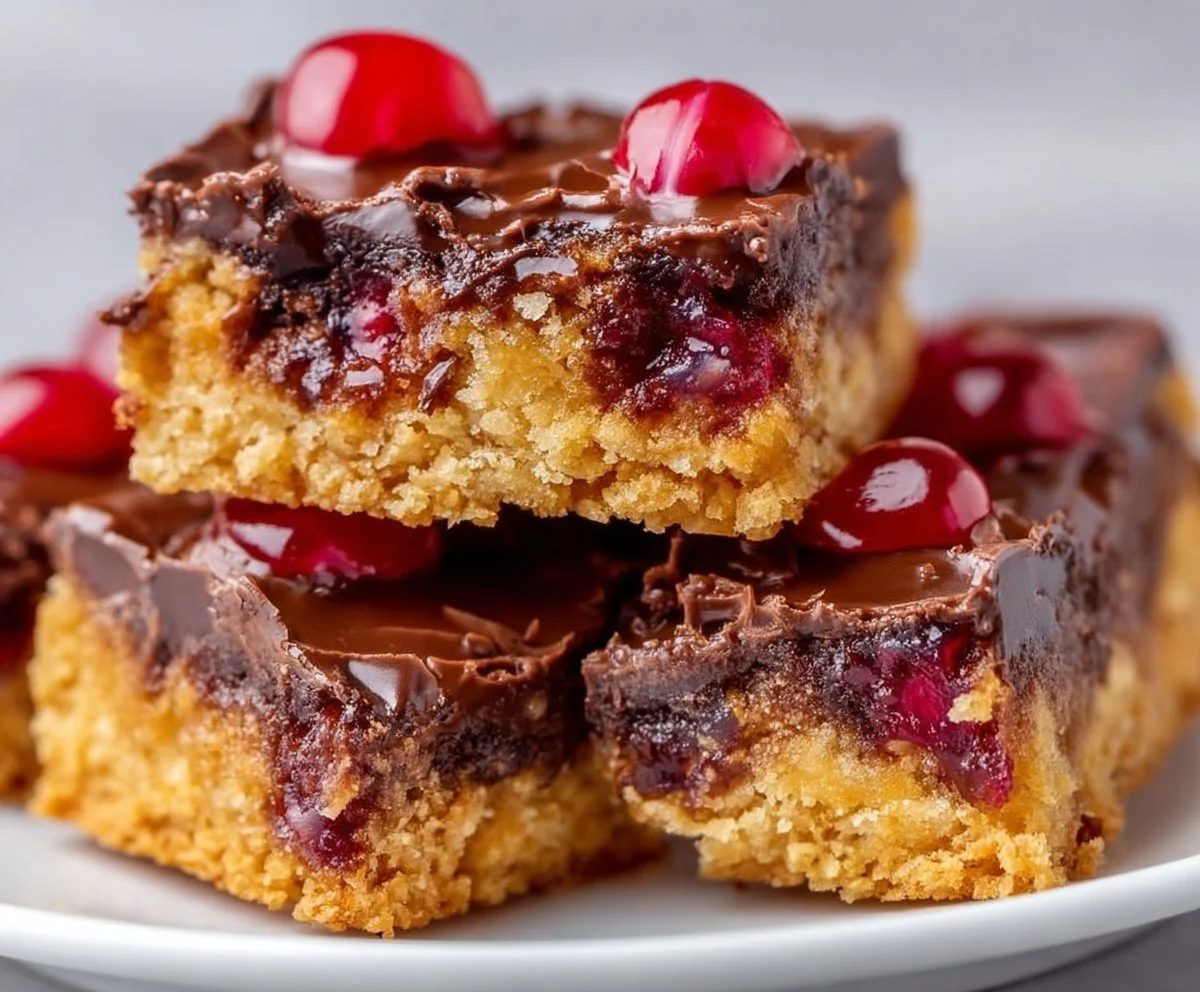
Are you looking for a dessert that is not only a treat for the taste buds but also a breeze to prepare? Look no further than these No-Bake Cherry Chocolate Bars! Imagine the rich aroma of dark chocolate paired with the sweet burst of cherry, enveloped in a creamy base that melts in your mouth. The colors of deep red cherries against glossy dark chocolate create a visually stunning treat that is as lovely to look at as it is to eat. Whether you’re hosting a family gathering, a festive holiday party, or simply craving a late-night snack, these bars are sure to become a favorite. Perfect for weeknight indulging or crowd-pleasing affairs, you’ll find that these No-Bake Cherry Chocolate Bars are ready in no time and require no oven. So, keep your spoons at the ready—the magic is about to unfold!
What Is No-Bake Cherry Chocolate Bars?
No-Bake Cherry Chocolate Bars are a delightful dessert that marries the tangy essence of cherries with the decadence of chocolate without the need for baking. This treat typically features a biscuit or cracker crust, layered with a luscious filling made from cream cheese or yogurt, mixed with sweet cherries. The popular concept of no-bake desserts emerged in the mid-20th century, making it easy for families to whip up delicious treats without the fuss of heat, making them a hit in homes and parties alike. An essential part of many gatherings, they stand as symbols of convenience fused with the elegance of delightful flavors.
What sets these bars apart is their incredible versatility and flexibility. You won’t need to fluff up any whipped creams or deal with temperamental ovens—just mix, layer, chill, and enjoy! The joy of these bars isn’t just in their rich flavors but also in their visual appeal. The vibrant red of the cherries contrasted with the deep hues of dark chocolate gives them a show-stopping presence at any gathering. Often served chilled, these bars provide a refreshing finish to a meal or a midday pick-me-up, making them the perfect companion for coffee or afternoon tea.
Why You’ll Love This No-Bake Cherry Chocolate Bars
There are countless reasons to adore these No-Bake Cherry Chocolate Bars, but let’s highlight the most compelling aspects. First and foremost, they are incredibly easy to whip up—a fantastic option for beginners or those short on time. Just a handful of ingredients come together in a matter of minutes, allowing for a stress-free preparation experience. What’s more, the contrasting tastes of sweet cherries and rich chocolate create a luxurious experience that leaves your palate celebrating after every bite.
- Ease of Preparation: With no oven required, these bars can be made quickly and effortlessly. Just mix, layer, and refrigerate!
- Flavor Complexity: The delightful combination of sweet cherries with the smooth, rich flavor of chocolate creates a symphony of tastes that is hard to resist.
- Family-Friendly or Kid-Approved: The delicious layers and vibrant colors make these bars appealing to kids and adults alike, ensuring they find a spot in every family gathering.
- Budget-Friendly or Ingredient Flexibility: Most of the ingredients are pantry staples; you can easily switch things up based on what you have on hand, creating variations that suit your taste.
How to Make No-Bake Cherry Chocolate Bars
Preparing No-Bake Cherry Chocolate Bars is a straightforward process that requires minimal tools and ingredients. You’ll need a mixing bowl, a spatula, and a square baking pan or a similar dish to set your dessert. This no-bake recipe typically takes about 20 minutes of hands-on time and a few hours of chilling in the refrigerator, making it incredibly manageable even for those with the busiest schedules.
Ingredients
- 1 ½ cups graham cracker crumbs: Forms the base of the bars, offering a delightful crunch and flavor.
- ½ cup melted unsalted butter: Holds the crust together while adding richness.
- 1 cup cream cheese, softened: Provides a creamy texture and tangy flavor that beautifully complements the sweetness.
- ½ cup powdered sugar: Sweetens the mixture, balancing the tartness of cherries.
- 1 cup cherry pie filling: Adds juicy sweetness and a pop of color; fresh or frozen cherries can be substituted.
- 1 cup dark chocolate chips: The star ingredient that gives the bars their rich chocolate flavor.
- 1 tablespoon coconut oil: Ensures the chocolate layer is smooth and shiny when melted.
Directions
Prepare the Crust: In a mixing bowl, combine the graham cracker crumbs and melted butter. Stir until all the crumbs are evenly coated. The mixture should look like wet sand. Press it into the bottom of a lined square baking pan (about 8×8 inches) firmly so it sets well. Refrigerate for about 15 minutes to harden.
Make the Cream Cheese Layer: In a mixer’s bowl, beat the softened cream cheese until smooth and creamy. Gradually add in the powdered sugar, mixing until completely combined. The mixture should be light and fluffy.
Add the Cherry Filling: Gently fold in the cherry pie filling into the cream cheese mixture, ensuring the cherries are evenly distributed. The red cherries will create a beautiful marbling effect within the cream cheese.
Spread the Filling: Retrieve your pan from the refrigerator and pour the cherry cream cheese mixture over the crust, gently spreading it out with a spatula until it’s even. Return to the fridge for at least 30 minutes, allowing it to set while you prepare the chocolate layer.
Prepare the Chocolate Layer: In a microwave-safe bowl, combine the dark chocolate chips and coconut oil. Microwave in 30-second intervals, stirring after each, until fully melted and smooth. Be careful not to overheat; stop when the chocolate is glossy and fluid.
Layer the Chocolate Topping: Once the cream cheese filling has set, pour the melted chocolate on top and spread evenly for a smooth finish. Return the bars to the fridge and chill for an additional 1-2 hours or until the chocolate is firm.
Slice and Serve: When ready to serve, lift the bars from the pan using the parchment paper. Use a sharp knife heated under hot water (then dried) to slice into squares. The bars should hold their shape but will have a lovely creamy interior!
What to Serve With No-Bake Cherry Chocolate Bars
When it comes to serving No-Bake Cherry Chocolate Bars, there are numerous options that can elevate your dessert experience. These bars are perfect for serving alongside a cup of rich coffee or a glass of cold milk to balance the sweetness. Their dense texture beautifully complements lighter options, so pair them with fresh whipped cream or a dollop of vanilla ice cream.
- Coffee: The bitterness of coffee provides a wonderful contrast to the sweetness of the bars, balancing the flavors nicely.
- Vanilla Ice Cream: The creamy, cold texture of vanilla ice cream accentuates the richness of the chocolate, making every bite a delight!
- Fresh Fruit Salad: A light fruit salad can provide refreshing acidity to counter the sweetness, creating a well-rounded dessert plate.
- Chilled Sparkling Water: This option serves as a lovely palate cleanser, enhancing the experience of this rich treat.
Top Tips for Perfecting No-Bake Cherry Chocolate Bars
Getting the nuances right in your No-Bake Cherry Chocolate Bars can elevate them from good to spectacular. Paying attention to method can make all the difference in flavor and texture, leading to that “wow” factor with every bite!
- Ingredient Swaps or Upgrades: Consider using whole wheat graham cracker crumbs for a nuttier flavor or swap dark chocolate for milk chocolate for those who prefer sweeter options.
- Spice Adjustments: A sprinkle of cinnamon or even some cocoa powder in the crust can add depth. Feel free to play with extracts, like adding vanilla or almond, for extra flavor.
- Equipment Advice: A food processor makes crushing the graham crackers super easy. If you don’t have one, simply place the crackers in a zip-top bag and crush them with a rolling pin!
- Storage Tips: Keep the bars refrigerated in an airtight container for up to a week, or freeze them for longer storage; cut into smaller squares for easy access.
- Mistakes to Avoid: Ensure your cream cheese is fully softened for smooth mixing; any lumps can affect the creamy texture! Also, make sure to let the layers set properly for clean cuts.
Variations & Add-Ins
To keep your No-Bake Cherry Chocolate Bars fresh and exciting, consider trying out these variations:
- Nutty Version: Incorporate finely chopped nuts like walnuts or pecans into the crust for added texture and flavor.
- Dark Chocolate Cherry Version: Use dark chocolate cherry yogurt instead of cream cheese to add a fruity twist while keeping the bars creamy.
- Mint Chocolate Twist: Add a few drops of mint extract to the chocolate layer for a refreshing mint-chocolate sensation.
- Dairy-Free Alternative: Substitute cream cheese with vegan cream cheese, and use coconut milk or almond milk yogurt for a creamy, non-dairy option.
Kid-Friendly Version
Making No-Bake Cherry Chocolate Bars appealing to children can be easy and fun! Stick to slightly sweeter chocolate options like milk chocolate, as kids typically enjoy the sweet flavor. You can also add colorful sprinkles on top of the melted chocolate layer for a playful touch. For an extra interactive experience, involve the little ones in the mixing and layering process—let them spread and sprinkles the layers, turning the creation of these bars into a family activity that is both enjoyable and delicious!
Storing and Reheating Tips
To keep your No-Bake Cherry Chocolate Bars fresh, proper storage is crucial. Store the bars in the refrigerator, as the cool environment will help maintain their shape and creaminess. Use an airtight container lined with parchment paper to prevent sticking. When stored this way, they can last up to a week, allowing you to savor them over several days without losing quality. If you plan to enjoy the bars later, you can freeze them wrapped tightly in plastic wrap and stored in a freezer-safe container for up to three months.
When it comes to reheating your No-Bake Cherry Chocolate Bars, it’s important to remember that they are best enjoyed chilled! However, if you prefer them slightly soft, a quick warm-up in the microwave for about 10-15 seconds can enhance the creamy texture without melting the chocolate. If they’ve been frozen, allow them to thaw in the refrigerator for a few hours before enjoying to retain their delightful structure.
FAQs
Can I make these bars ahead of time?
Absolutely! These bars can be made a day or two in advance since they hold well in the refrigerator. Just keep them stored in an airtight container to maintain freshness.
Can I substitute fresh cherries instead of cherry pie filling?
Yes, you can! Just use around 1 cup of pitted and chopped fresh cherries mixed with a bit of sugar for added sweetness. This will create a fresh and juicy alternative.
What if I don’t have graham crackers?
No problem! You can replace graham crackers with digestive biscuits or even vanilla wafers for a different flavor profile in the crust.
Are there any dietary adaptations?
Certainly! You can make these bars gluten-free by using gluten-free graham crackers or flour-based substitutes. For a vegan option, use dairy-free cream cheese and chocolate.
How long will the bars last in the freezer?
These bars can be stored in the freezer for up to three months. Just make sure they are wrapped tightly to prevent freezer burn.
Conclusion
In conclusion, these No-Bake Cherry Chocolate Bars are the perfect way to indulge without the need for extensive preparation or baking. They capture the essence of a traditional dessert while offering modern convenience and delicious flavor. Your family and friends will love the creamy sweetness, and you’ll appreciate the simplicity and versatility of the recipe. So why wait? Try it tonight and let me know how it turned out!
PrintNo-Bake Cherry Chocolate Bars
A delightful dessert featuring rich dark chocolate layered with sweet cherries, all in a creamy no-bake base.
- Prep Time: 20 minutes
- Cook Time: 0 minutes
- Total Time: 120 minutes
- Yield: 16 servings 1x
- Category: Dessert
- Method: No-Bake
- Cuisine: American
- Diet: Vegetarian
Ingredients
- 1 ½ cups graham cracker crumbs
- ½ cup melted unsalted butter
- 1 cup cream cheese, softened
- ½ cup powdered sugar
- 1 cup cherry pie filling
- 1 cup dark chocolate chips
- 1 tablespoon coconut oil
Instructions
- Prepare the Crust: In a mixing bowl, combine graham cracker crumbs and melted butter. Press into a lined square baking pan and refrigerate for 15 minutes.
- Make the Cream Cheese Layer: Beat cream cheese until smooth, gradually add powdered sugar, and mix until light and fluffy.
- Add the Cherry Filling: Fold in cherry pie filling until evenly distributed.
- Spread the Filling: Pour the cherry cream cheese mixture over the crust and return to fridge for 30 minutes.
- Prepare the Chocolate Layer: Melt dark chocolate chips and coconut oil together in microwave until smooth.
- Layer the Chocolate Topping: Pour melted chocolate over the cream cheese layer and chill for 1-2 hours until firm.
- Slice and Serve: Slice bars using a hot knife and serve chilled.
Notes
Store in the refrigerator for up to a week or freeze for longer storage.
Nutrition
- Serving Size: 1 bar
- Calories: 250
- Sugar: 20g
- Sodium: 150mg
- Fat: 14g
- Saturated Fat: 8g
- Unsaturated Fat: 5g
- Trans Fat: 0g
- Carbohydrates: 30g
- Fiber: 1g
- Protein: 3g
- Cholesterol: 30mg