Delicious Garlic Parmesan Cheeseburger Bombs for Family Fun
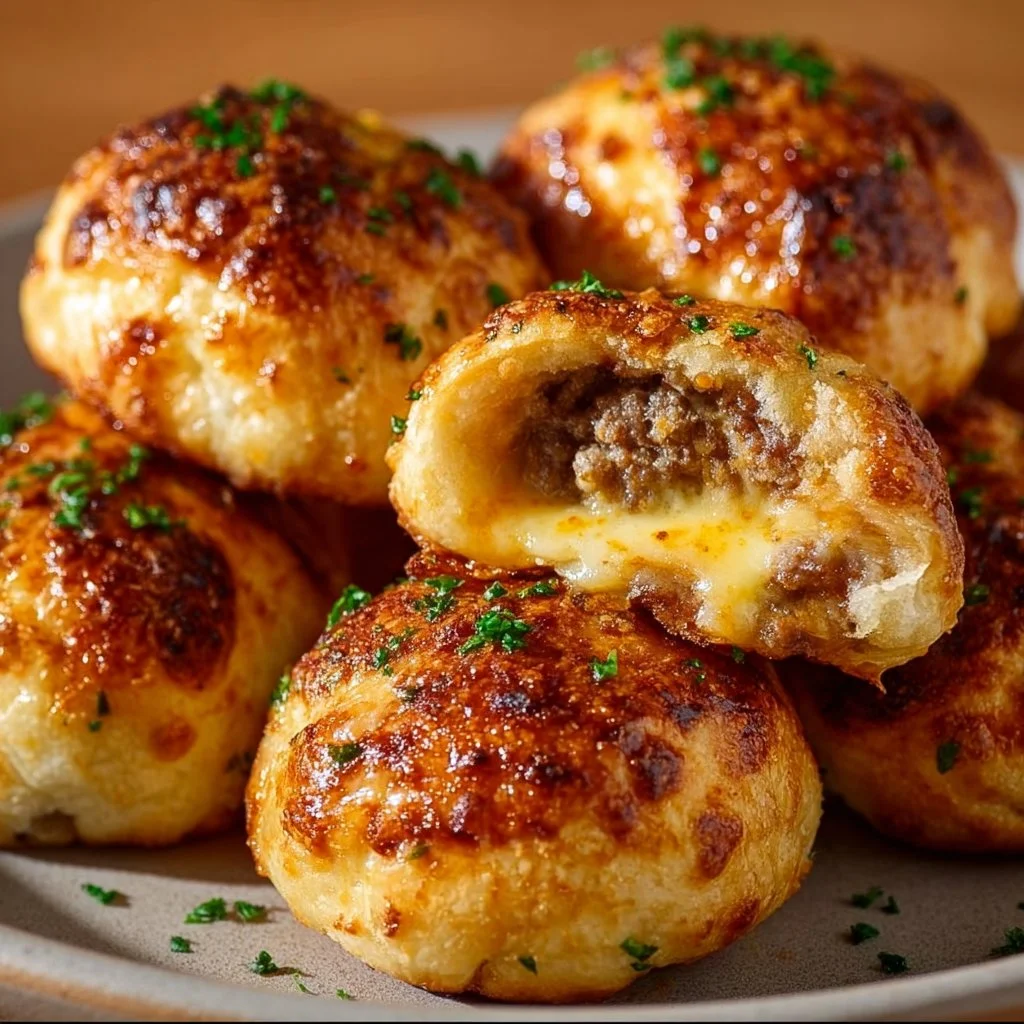
If you’re looking for a meal that combines comfort, flavor, and the joy of sharing with loved ones, Garlic Parmesan Cheeseburger Bombs are the answer! These delightful little bundles of joy are not only easy to prepare but also incredibly satisfying. Just imagine the moment you bite into a warm, golden-brown pastry, bursting with savory ground beef and melty cheese, while the aroma of garlic and parmesan dances in the air. The combination of crispy outer crust and juicy filling creates a delightful textural contrast that will leave you craving more. Whether you whip them up for a busy weeknight dinner or as an impressive appetizer for a gathering, these bombs are bound to become a family favorite. So gather your loved ones around the table and let’s dive into the magic of Garlic Parmesan Cheeseburger Bombs!
What Is Garlic Parmesan Cheeseburger Bombs?
Garlic Parmesan Cheeseburger Bombs are savory little pastries that marry two beloved classics: cheeseburgers and garlic bread. Originating from the creativity of home cooks looking for fun and innovative ways to present classic flavors, these bombs have quickly become a pop-culture phenomena, particularly in family kitchens across the globe. The buttery, flaky dough encases a perfectly seasoned mixture of ground beef, cheese, and garlic, delivering an explosion of flavor with each bite. They are often served as appetizers, party snacks, or even as a casual dinner option that everyone can enjoy.
The beauty of these cheeseburger bombs lies in their versatility. You can choose to bake them, which will give you that delightful crunch on the outside while keeping the inside juicy, or you can opt for an air-fryer method, which ensures they’re perfectly cooked and crispy with a fraction of the oil. Both methods enhance the flavors and texture, delivering a satisfying crunch that contrasts beautifully with the tender filling. They are typically served warm, allowing the gooey cheese to stretch as you pull them apart, inviting everyone to dig in. Did you know that cheeseburger-themed recipes have been around since the mid-1900s, evolving into a staple of American cuisine? Garlic Parmesan Cheeseburger Bombs are the perfect modern twist on this classic!
Top Reasons to Make Garlic Parmesan Cheeseburger Bombs
Why should you add Garlic Parmesan Cheeseburger Bombs to your cooking repertoire? For starters, they’re incredibly easy to prepare, making them perfect for both novice and seasoned cooks alike. You don’t need to be a master chef to impress your family or guests with these mouthwatering treats.
- Ease of Preparation: With just a handful of ingredients and straightforward steps, these bombs come together in no time. Perfect for those hectic weeknights!
- Flavor Complexity: The combination of garlic, parmesan, and seasoned beef creates a deliciously rich and savory flavor profile that will tantalize your taste buds.
- Family-friendly or Kid-approved: Kids love anything that they can eat with their hands, and these bombs are no exception! They are sure to please picky eaters in your household.
- Budget-friendly or Ingredient Flexibility: You can easily customize the filling with different cheeses, meats, or vegetables based on what you have on hand or your family’s dietary preferences.
How to Make Garlic Parmesan Cheeseburger Bombs
Let’s get cooking! Garlic Parmesan Cheeseburger Bombs will require minimal prep and a touch of love to create a truly memorable dish. This recipe involves quick cooking on the stovetop, followed by baking the bombs for that crispy crust everyone loves.
Ingredients:
- 1 pound ground beef: Provides a hearty filling; use ground turkey or chicken for a lighter option.
- ½ cup shredded cheddar cheese: The melty goodness that binds everything; feel free to swap with your favorite cheese.
- 1 can refrigerated biscuit dough: Forms the outer crust; crescent roll dough can work as a substitute.
- 3 tablespoons minced garlic: Infuses the filling with aromatic flavor; garlic powder can be used, but fresh is best.
- ¼ cup grated Parmesan cheese: Adds a delightful nuttiness; pecorino can be an interesting alternative.
- Salt and pepper to taste: Essential for seasoning the beef and balancing flavors.
- 1 tablespoon olive oil: Helps brown the beef and enhances flavor; you can use any cooking oil you prefer.
Directions:
-
Preheat Your Oven: Set your oven to 375°F (190°C). This encouraging warmth signifies that something delicious is on the way!
-
Cook the Beef: In a large skillet, heat the olive oil over medium-high heat. Add in the ground beef, season with salt and pepper, and toss in the minced garlic. Cook for about 7-10 minutes until the beef is browned and fully cooked, stirring occasionally. The smell of garlic sizzling in the pan is heavenly!
-
Mix in the Cheeses: Once the beef is nicely browned, remove the skillet from heat and stir in the cheddar and parmesan cheese until melted and well combined. Set aside to cool slightly; you don’t want to scorch your fingers when assembling!
-
Prepare the Dough: Open the can of biscuit dough and separate the biscuits. Flatten each biscuit into about 4-inch rounds using your fingertips. This will be the little pockets holding all the goodness.
-
Fill the Dough: Spoon about a tablespoon of the beef and cheese mixture onto the center of each biscuit round. Fold the dough over the filling and pinch the edges securely to prevent any leaking during baking. Arrange them seam-side down on a baking tray lined with parchment paper.
-
Bake to Perfection: Place the tray in the preheated oven and bake for 12-15 minutes or until the bombs are golden brown on the outside. Keep an eye on them; the aroma will start to fill your kitchen, promising something delicious soon!
-
Enjoy: Allow the bombs to cool for a few minutes before serving. This little rest allows the cheesy filling to set slightly, making it easier to eat. Get ready for ooey-gooey goodness as you take that first bite!
What to Serve With Garlic Parmesan Cheeseburger Bombs
Garlic Parmesan Cheeseburger Bombs can undoubtedly stand on their own, bursting with flavor and satisfaction. However, pairing them with complementary sides can elevate the experience even further!
- Crispy French Fries: A classic side that offers a satisfying crunch and pairs wonderfully with the soft, cheesy bombs. Dip them in ranch or ketchup for a fun twist!
- Garden Salad: A fresh green salad helps balance the richness of the bombs, adding a refreshing crunch with bright flavors. Toss in light vinaigrette to bring it all together.
- Coleslaw: The creamy, tangy flavor of coleslaw contrasts nicely with the savory bombs and provides a delightful crunch.
- Side of Marinara Sauce: Serve with a warm marinara for dipping, enhancing the Italian-inspired flavors of garlic and parmesan.
- Iced Tea or Lemonade: Refreshing beverages can complement these savory bites perfectly, enhancing the overall experience.
Top Tips for Perfecting Garlic Parmesan Cheeseburger Bombs
Crafting the perfect Garlic Parmesan Cheeseburger Bombs comes down to a few key techniques and tips. Planning ahead and paying attention to details will ensure every batch is a hit!
- Ingredient Swaps: Feel free to substitute ingredients based on dietary needs, such as using gluten-free biscuits or plant-based cheese.
- Spice Adjustments: Want a bit of heat? Add a pinch of chili flakes or a splash of hot sauce to the beef mixture for extra flavor.
- Equipment Advice: Prepare using either a skillet for stovetop cooking or an air fryer for an even healthier version—both yield delicious results.
- Storage Tips: Store any leftovers in an airtight container in the fridge for up to 3 days. They also freeze well for longer storage.
- Mistakes to Avoid: Ensure the biscuit dough seals well around the filling; unsealed seams may result in filling leaking out during baking. If the dough feels too thick, roll it out slightly for more surface area.
Variations & Add-Ins
Looking for ways to customize your Garlic Parmesan Cheeseburger Bombs? Try these variations for an exciting twist!
- Buffalo Chicken Bombs: Substitute ground beef with shredded chicken mixed with buffalo sauce for a spicy kick that will ignite your tastebuds.
- Vegetarian Version: Replace the meat with cooked, finely chopped mushrooms or plant-based ground meat for a hearty, vegetarian-friendly meal.
- Cheesy Jalapeño Bombs: Add chopped jalapeños into the meat mixture for a delightful heat that perfectly contrasts the creamy cheese.
- Breakfast Bombs: Use breakfast sausage and scrambled eggs instead of ground beef, perfect for a weekend brunch treat!
Kid-Friendly Version
Creating a kid-friendly version of Garlic Parmesan Cheeseburger Bombs can be incredibly simple and makes dinnertime more fun! You might want to reduce the garlic, as some kids may prefer milder flavors. Consider using a sprinkle of their favorite spices or even add in chopped veggies for a colorful, nutritious twist. Encourage them to help assemble the bombs; kids love being part of the cooking process! A fun presentation like cut-out shapes or dipping sauces can make these bombs even more appealing to young eaters.
Storing and Reheating Tips
When it comes to leftovers, proper storage can extend the shelf-life of your Garlic Parmesan Cheeseburger Bombs. Allow the bombs to cool completely before transferring them to an airtight container. They can be stored in the refrigerator for up to 3 days. If you need to keep them longer, freezing is an excellent option. Just make sure to use a freezer-safe container and label it with the date for convenient meal planning!
For reheating, you can choose your method based on preference. If you want that fresh-out-of-the-oven taste, preheat your oven to 350°F (175°C) and bake the bombs for about 10 minutes, or until heated through and crispy. Alternatively, microwave them on medium power for 30-40 seconds if you’re in a hurry, but keep in mind this may result in a softer exterior. Air frying is another great option—set the air fryer to 350°F and cook for about 5 minutes for a crispy finish. For freezing, let them thaw overnight in the refrigerator before reheating.
FAQs
Can I prepare Garlic Parmesan Cheeseburger Bombs ahead of time?
Absolutely! You can prepare the filling and assemble the bombs ahead of time. Simply store them in the refrigerator uncooked for up to 24 hours. When you’re ready, bake them right from the fridge, adding a few extra minutes to the baking time.
What are some good substitutions for the filling?
The filling is highly customizable! Use turkey, chicken, or even plant-based ground meat for a healthier or vegetarian option. For a cheesy indulgence, mix in cream cheese or add different flavored cheeses like pepper jack for a little spice.
How can I make these gluten-free?
To make Garlic Parmesan Cheeseburger Bombs gluten-free, simply use gluten-free biscuit dough. Many brands offer ready-made gluten-free dough that can be used as a delicious alternative, maintaining the same satisfying texture.
Conclusion
Garlic Parmesan Cheeseburger Bombs are sure to become a favorite in your home, blending a familiar flavor with a fun presentation that invites conversation and satisfaction. Whether you’re having a cozy family dinner or entertaining guests, these flavorful, cheesy delights fit the bill every time. So roll up your sleeves, gather the ingredients, and treat your loved ones to this inviting meal that’s bursting with flavor. Try it tonight and let me know how it turned out!
Garlic Parmesan Cheeseburger Bombs

Delicious little pastries filled with savory ground beef, cheese, and garlic, perfect for family dinners or as a fun appetizer.
- Prep Time: 15 minutes
- Cook Time: 15 minutes
- Total Time: 30 minutes
- Yield: 12 servings 1x
- Category: Appetizer
- Method: Baking
- Cuisine: American
- Diet: Carnivore
Ingredients
- 1 pound ground beef
- ½ cup shredded cheddar cheese
- 1 can refrigerated biscuit dough
- 3 tablespoons minced garlic
- ¼ cup grated Parmesan cheese
- Salt and pepper to taste
- 1 tablespoon olive oil
Instructions
- Preheat your oven to 375°F (190°C).
- In a large skillet, heat the olive oil over medium-high heat. Add in the ground beef, season with salt and pepper, and add the minced garlic. Cook for about 7-10 minutes until browned.
- Once browned, remove from heat and stir in cheddar and Parmesan cheese until melted. Set aside to cool slightly.
- Open the biscuit dough and separate the biscuits. Flatten each into 4-inch rounds.
- Spoon about a tablespoon of the beef and cheese mixture onto each biscuit round. Fold the dough over the filling and pinch the edges securely.
- Arrange them seam-side down on a baking tray lined with parchment paper.
- Bake for 12-15 minutes or until golden brown.
- Allow to cool for a few minutes before serving.
Notes
Feel free to customize the filling with different cheeses or try using gluten-free biscuit dough.
Nutrition
- Serving Size: 1 serving
- Calories: 250
- Sugar: 1g
- Sodium: 450mg
- Fat: 15g
- Saturated Fat: 6g
- Unsaturated Fat: 8g
- Trans Fat: 0g
- Carbohydrates: 22g
- Fiber: 1g
- Protein: 12g
- Cholesterol: 50mg