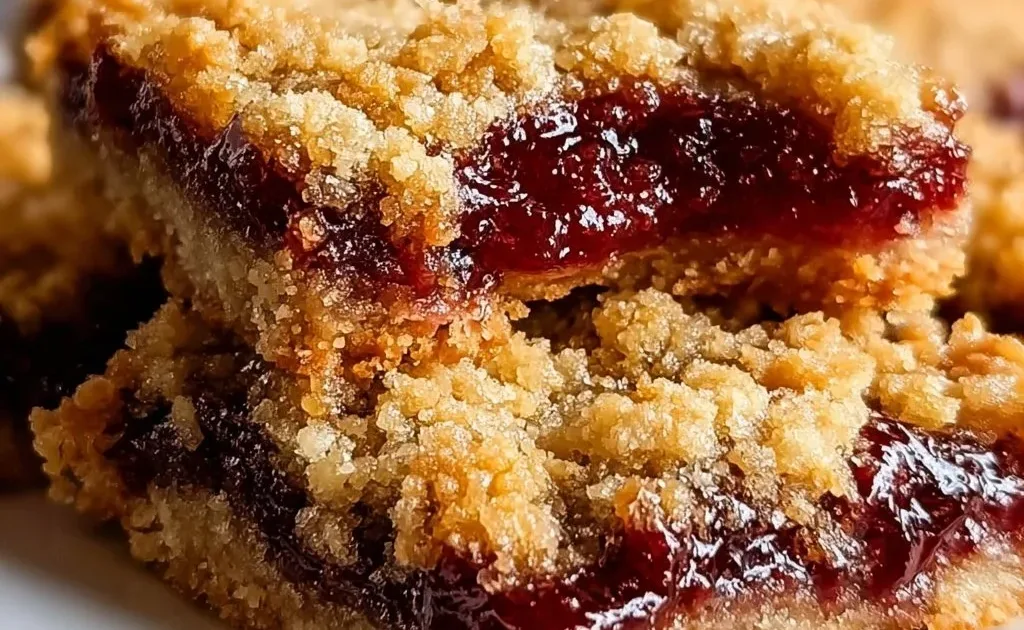
Warm, sweet, and bursting with cherry flavor, Cherry Pie Bars are a must-try family dessert. They bring all the deliciousness of a traditional cherry pie but come together with less fuss and more portability. Imagine biting into a soft, tender crust filled with sweetened cherries, all topped off with a sprinkle of sweet crumb topping. Ready to bake a batch that will fill your home with that heavenly aroma? Let’s dive in!
What Is Cherry Pie Bars?
Cherry Pie Bars are a delightful twist on the classic cherry pie, transforming it into a handheld, easy-to-eat dessert. Instead of the usual pie crust, we’re using a simple dough that creates a base, filling, and crumb topping all in one cohesive treat. These bars are perfect for parties, potlucks, or simply enjoying at home with your family.
Why You’ll Love This Cherry Pie Bars
- Convenience: No rolling out pie crust! Just mix, layer, and bake.
- Flavor: The sweet and tart cherry filling pairs beautifully with a buttery crumble.
- Customizable: Feel free to swap cherries for your favorite fruits—blueberries, peaches, or apples work wonders.
- Budget-Friendly: Using canned cherries or frozen fruit keeps this dessert easy on the wallet.
- Perfect for Sharing: These bars are easy to cut into portions, making them perfect for gatherings.
How to Make Cherry Pie Bars
Quick Overview
This recipe is straightforward and requires minimal prep time. You’ll mix a simple crust, layer in cherries, and top it off with a crumbly topping before baking to golden perfection.
Ingredients
- 1 cup all-purpose flour – for the crust and topping
- 1/2 cup unsalted butter, softened – adds richness
- 1/2 cup granulated sugar – sweetness for the crust
- 1/4 teaspoon salt – to enhance flavor
- 1/4 teaspoon baking powder – for a bit of rise
- 1 can (21 oz) cherry pie filling – or fresh cherries with sugar and cornstarch
- 1 teaspoon vanilla extract – enhances overall flavor
- Optional: powdered sugar – for dusting after baking
Directions
- Preheat the oven to 350°F (175°C).
- Prepare the pan: Grease an 8×8-inch baking dish and set aside.
- Make the crust: In a bowl, cream together the butter and sugar. Mix in flour, salt, and baking powder until well combined. The mixture will be crumbly.
- Layer the crust: Press two-thirds of the mixture evenly into the prepared baking dish to form the base.
- Add the filling: Spread the cherry pie filling evenly over the crust. If using fresh cherries, toss them with sugar and cornstarch before spreading.
- Top with crumble: Sprinkle the remaining one-third of the crust mixture on top of the cherry filling.
- Bake: Place in the oven and bake for 30-35 minutes, or until the top is golden brown. Allow to cool before slicing.
What to Serve With Cherry Pie Bars
- Ice Cream: Vanilla, almond, or even cherry ice cream pairs perfectly.
- Whipped Cream: A dollop on top adds extra sweetness.
- Coffee or Tea: Enjoy with a warm cup for a cozy afternoon treat.
- Fresh Fruit: Serve with a side of fresh berries to balance the sweetness.
- Family Gatherings: Perfect for birthday parties, picnics, or holiday celebrations.
Top Tips for Perfecting Cherry Pie Bars
- Substitutions: Use another fruit filling like blueberry or peach if you prefer.
- Spice adjustments: Add a pinch of cinnamon or nutmeg for extra warmth.
- Storage: Keep leftovers in an airtight container at room temperature for up to 3 days or refrigerate for up to a week.
- Equipment: A non-stick baking dish will help with easy removal.
- Make it gluten-free: Substitute with your favorite gluten-free flour blend.
Storing and Reheating Tips
- Refrigeration: Store cooled Cherry Pie Bars in an airtight container in the refrigerator for up to a week.
- Reheating: Heat individual servings in the microwave for 10-15 seconds or enjoy cold!
- Freezing: Freeze bars wrapped individually in plastic wrap for up to 2 months. Thaw in the fridge before enjoying.

FAQs
- Can I use fresh cherries instead of canned? Yes! Just toss fresh pitted cherries with sugar and cornstarch before using.
- How spicy can I make it? This recipe isn’t spicy, but you can add cinnamon for flavor.
- Can I prep this ahead of time? Absolutely! You can prepare the crust and filling one day in advance.
- What’s the cook time? Bake for 30-35 minutes until the top is golden brown.
Conclusion
These Cherry Pie Bars are not just tasty; they’re a breeze to make and perfect for sharing with loved ones. Imagine the smiles at the kitchen table when you serve this delectable dessert! Try it tonight and let me know how it turned out!
PrintCherry Pie Bars
Warm, sweet, and bursting with cherry flavor, these Cherry Pie Bars offer a delightful twist on the classic cherry pie in a portable format.
- Prep Time: 15 minutes
- Cook Time: 35 minutes
- Total Time: 50 minutes
- Yield: 16 servings 1x
- Category: Dessert
- Method: Baking
- Cuisine: American
- Diet: Vegetarian
Ingredients
- 1 cup all-purpose flour
- 1/2 cup unsalted butter, softened
- 1/2 cup granulated sugar
- 1/4 teaspoon salt
- 1/4 teaspoon baking powder
- 1 can (21 oz) cherry pie filling
- 1 teaspoon vanilla extract
- Optional: powdered sugar for dusting
Instructions
- Preheat the oven to 350°F (175°C).
- Grease an 8×8-inch baking dish and set aside.
- Cream together the butter and sugar in a bowl.
- Mix in flour, salt, and baking powder until well combined. The mixture should be crumbly.
- Press two-thirds of the mixture evenly into the prepared baking dish to form the base.
- Spread the cherry pie filling evenly over the crust.
- Sprinkle the remaining one-third of the crust mixture on top of the cherry filling.
- Bake for 30-35 minutes, or until the top is golden brown. Allow to cool before slicing.
Notes
Serve with ice cream or whipped cream for added sweetness. Store leftovers in an airtight container for up to a week.
Nutrition
- Serving Size: 1 bar
- Calories: 220
- Sugar: 12g
- Sodium: 150mg
- Fat: 10g
- Saturated Fat: 6g
- Unsaturated Fat: 4g
- Trans Fat: 0g
- Carbohydrates: 30g
- Fiber: 1g
- Protein: 2g
- Cholesterol: 30mg