

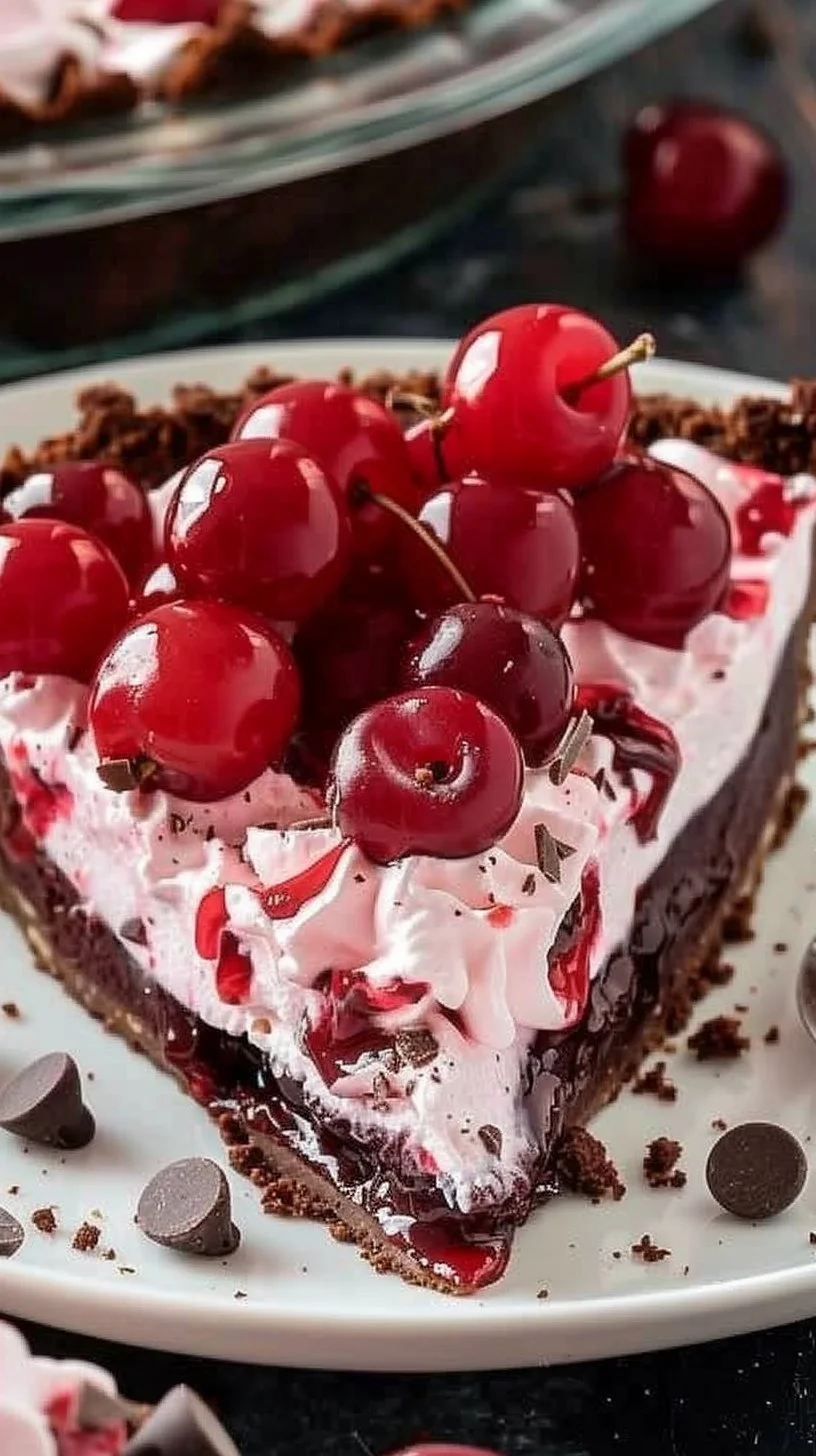
Chocolate Cherry Pie (No Bake)
Warm, creamy, and just a little bit decadent, this Chocolate Cherry Pie (No Bake) is a simple showstopper for dessert nights and potlucks. The deep chocolate cookie crust cradles a luxuriously smooth cream cheese filling that is lightened with whipped cream, while bright cherry pie filling on top adds a juicy, slightly tart contrast. A final drizzle of melted chocolate adds snap and richness that complements the cherries. The texture is a delightful mix of crisp cookie base, creamy middle, and glossy fruit topping. It smells like chocolate and sweet cherries with a hint of buttery pastry, even though there is no baking involved. Serve this pie on warm afternoons, at holiday gatherings, or whenever you want an elegant dessert without turning on the oven. If you enjoy cherry desserts, you might also like this cherry pie bars recipe that shares similar flavors in a different format.
Ingredients
-
1 1/2 cups chocolate cookie crumbs
Finely crushed chocolate sandwich or chocolate wafer cookies form a sturdy, chocolatey crust. -
1/2 cup unsalted butter, melted
Binds the crumbs and adds rich, buttery flavor to the crust. -
8 oz cream cheese, softened
Provides tang and body for the creamy filling; bring to room temperature for easiest blending. -
1 cup powdered sugar
Sweetens and smooths the cream cheese without grittiness. -
2 cups whipped cream or whipped topping
Lightens the filling for a mousse-like texture; use stabilized whipped cream or store-bought topping as preferred. See a similar idea in this chocolate cherry cake for pairing inspiration. -
1 can (21 oz) cherry pie filling
The sweet-tart fruit topping gives bright color and flavor; spread evenly for best presentation. -
2 cups chocolate chips
Melted and drizzled over the top for glossy chocolate finish and extra richness.
Step-by-Step Instructions
-
In a bowl, combine chocolate cookie crumbs with melted unsalted butter. Mix until the crumbs are well coated.
Tip: Press a small amount between your fingers to test for even coating; it should hold together when squeezed. -
Press the mixture firmly into the bottom of a 9-inch pie dish to form a crust.
Tip: Use the bottom of a measuring cup or glass to compact the crust evenly and create clean edges. -
In a separate bowl, beat softened cream cheese until smooth. Gradually mix in powdered sugar until fully blended.
Small tip: Beat on medium speed and scrape the bowl sides so the mixture is lump-free. -
Gently fold in whipped cream or whipped topping into the cream cheese mixture until smooth and creamy.
Tip: Use a rubber spatula and fold from the bottom up to keep the filling light and airy. -
Spread the cream cheese mixture evenly over the prepared crust.
Smooth the top with an offset spatula for a polished look. -
Top with cherry pie filling, spreading it evenly.
For a neater slice, spoon the filling gently to avoid breaking the cream layer. -
Melt chocolate chips and drizzle over the cherry layer.
Microwave in short bursts, stirring often, or melt in a heatproof bowl over simmering water. Drizzle with a fork or a spoon for decorative lines. -
Chill in the refrigerator for at least 2 hours before serving.
Chilling helps firm the filling and makes slicing cleaner.
For a slightly different presentation, you can fold a few chocolate chips into the filling before spreading, or use the second cherry pie bars recipe idea to serve this flavor combination in bars.
Recipe Details
- Prep Time: 20 minutes
- Cook Time: 0 minutes (no bake)
- Total Time: 2 hours 20 minutes (includes chilling)
- Servings: 8 slices
- Calories: Approximately 420 kcal per serving
Tips, Storage & Variations
Tips
- For the smoothest filling, make sure the cream cheese is fully softened.
- Press the crust up slightly on the sides to create a rim that keeps the cherry filling contained.
- Chill the pie on a flat surface to avoid sloshing the filling while it sets.
- If your melted chocolate thickens before you finish drizzling, warm it briefly in the microwave in 5 to 10 second intervals.
Storage
- Refrigerate leftovers covered with plastic wrap or an airtight lid for up to 4 days.
- For best texture, slice only what you will eat within 24 hours and keep the remainder chilled.
Freezing
- To freeze, cover the pie tightly with plastic wrap and then foil. Freeze for up to 1 month. Thaw overnight in the refrigerator before serving. Note that thawed pie may be slightly softer.
Variations using existing ingredients only
- Extra chocolate: Stir 1/2 cup of chocolate chips into the cream cheese filling for a double chocolate effect.
- Lighter filling: Use whipped topping instead of whipped cream for a lighter, more stable filling.
- Chunky chocolate finish: Sprinkle a few chocolate chips on top after drizzling melted chocolate so they stick into the warm drizzle.
For a related layered dessert idea, try these chocolate and nut flavor combinations in this chocolate coconut pecan cream pie or get playful with textures like in these chocolate covered cherry magic bars.
Frequently Asked Questions
-
Can I use store-bought cookie crumbs?
Yes, pre-made chocolate cookie crumbs work fine and save time. -
Do I have to bake the crust?
No. This recipe is designed with a no-bake cookie crumb crust that sets in the refrigerator. -
Can I substitute cream cheese with mascarpone?
You can, but mascarpone will be milder and slightly softer; use the same amount and chill well. -
How long should the pie chill before serving?
At least 2 hours so the filling firms and slices cleanly. -
Can I use fresh cherries instead of canned cherry pie filling?
Yes, but fresh cherries should be macerated with sugar or lightly cooked into a glaze to mimic the texture of pie filling. -
Is this pie freezer-friendly?
Yes, wrap tightly and freeze up to 1 month; thaw in the refrigerator before serving.
People Also Ask
-
How do you keep a no-bake pie from getting soggy?
Make a firm crust and chill the pie so the filling sets; press the crust compactly to reduce moisture absorption. -
What is the best way to melt chocolate chips for drizzling?
Microwave in 15 second bursts, stirring between, or use a double boiler for even melting. -
Can this pie be made ahead for a party?
Yes, make it the day before and keep refrigerated until serving. -
How do you slice a chilled cream pie neatly?
Use a sharp knife warmed under hot water, wipe dry, and slice with a steady pull. -
Is it okay to use whipped topping instead of real whipped cream?
Yes, whipped topping is stable and works well in this no-bake filling. -
What size pie dish is recommended for this recipe?
A standard 9-inch pie dish gives the right depth and portion sizes. -
Can I reduce the sugar in the filling?
You can reduce powdered sugar slightly, but it will change sweetness and texture. -
How many chocolate chips should I reserve for garnish?
Reserve a small handful to sprinkle on top after drizzling if you like added texture.
Conclusion
This Chocolate Cherry Pie (No Bake) is an easy, elegant dessert that balances rich chocolate and bright cherries with a creamy, airy filling. It is perfect for holidays, potlucks, or a quiet weekend treat when you want something special without turning on the oven. For an inspiring no-bake version created by another home baker, see this no-bake Chocolate Cherry Pie inspiration. If you enjoy chocolate covered cherry combinations, this Chocolate Covered Cherry Dream Pie recipe offers another dreamy take. I hope you try this recipe soon and share it with friends and family for a cozy, delicious moment.
PrintChocolate Cherry Pie (No Bake)
A no-bake dessert featuring a chocolate cookie crust, creamy filling, cherry topping, and a drizzle of melted chocolate.
- Prep Time: 20 minutes
- Cook Time: 0 minutes
- Total Time: 140 minutes
- Yield: 8 slices 1x
- Category: Dessert
- Method: No Bake
- Cuisine: American
- Diet: Vegetarian
Ingredients
- 1 1/2 cups chocolate cookie crumbs
- 1/2 cup unsalted butter, melted
- 8 oz cream cheese, softened
- 1 cup powdered sugar
- 2 cups whipped cream or whipped topping
- 1 can (21 oz) cherry pie filling
- 2 cups chocolate chips
Instructions
- In a bowl, combine chocolate cookie crumbs with melted unsalted butter. Mix until the crumbs are well coated.
- Press the mixture firmly into the bottom of a 9-inch pie dish to form a crust.
- In a separate bowl, beat softened cream cheese until smooth. Gradually mix in powdered sugar until fully blended.
- Gently fold in whipped cream or whipped topping into the cream cheese mixture until smooth and creamy.
- Spread the cream cheese mixture evenly over the prepared crust.
- Top with cherry pie filling, spreading it evenly.
- Melt chocolate chips and drizzle over the cherry layer.
- Chill in the refrigerator for at least 2 hours before serving.
Notes
For a different presentation, fold chocolate chips into the filling before spreading.
Nutrition
- Serving Size: 1 slice
- Calories: 420
- Sugar: 30g
- Sodium: 200mg
- Fat: 24g
- Saturated Fat: 14g
- Unsaturated Fat: 6g
- Trans Fat: 0g
- Carbohydrates: 49g
- Fiber: 2g
- Protein: 4g
- Cholesterol: 30mg
