Welcome, friends! Today, I’m thrilled to share my recipe for a delightful Denver Chocolate Sheet Cake—a treat that’s nothing short of a family favorite in my household. This cake is wonderfully rich and moist, bursting with deep chocolate flavors that swirl together in a harmonious blend, inviting everyone to gather for a slice. Imagine the aroma of fresh chocolate wafting through your kitchen, as a warm, chocolatey rectangle makes its grand debut. With its soft, tender crumb and glossy chocolate frosting, this cake is a feast for both the eyes and the palate.
What makes the Denver Chocolate Sheet Cake a top contender for weeknight desserts or gatherings? It’s super simple to whip up and comes together in just one bowl—with minimal mess and fuss. Whether you serve it warm from the oven or allow it to cool for a grand presentation, you’ll have a crowd-pleaser that leaves everyone smiling and asking for seconds. So let’s dive right into this magical chocolatey world!
A Closer Look at Denver Chocolate Sheet Cake
The Denver Chocolate Sheet Cake is often referred to as a nostalgic delight, having its roots in the heart of Colorado. Often enjoyed during potlucks, family celebrations, or holiday gatherings, this cake embodies the spirit of togetherness. This sheet cake is particularly fun because it takes the classic chocolate cake and elevates it to a vibrant, shareable masterpiece that’s both easy to serve and visually appealing—a win-win! The added bonus of a silky chocolate frosting makes every bite a celebration of flavor.
One unique aspect of the Denver Chocolate Sheet Cake is that it can easily be adapted for different cooking methods. Whether you’re using a slow cooker, making it in an air fryer, or opting for a traditional oven bake, each method provides an opportunity to enhance the cake’s flavor and texture. For instance, a slow cooker version results in an extraordinarily moist cake with a slight fudginess, while an air fryer can create a fluffy, perfectly cooked treat in less time. It’s truly versatile and perfect for any occasion, serving as a sweet ending to dinner or a thoughtful surprise for a friend.
Why You’ll Love This Recipe
This Denver Chocolate Sheet Cake is not just any dessert; it is a celebration of simplicity and taste. The ease of preparation allows even the busiest of families to indulge in homemade sweetness without feeling overwhelmed. Each slice of cake reveals a beautifully moist texture that, when combined with the rich chocolate frosting, bursts with flavor in every bite. Kids and adults alike will find it hard to resist this chocolatey delight.
- Ease of preparation: With just one bowl required and minimal ingredients, you’ll find that this cake is quick to make, perfect for weeknight desserts.
- Flavor complexity: The deep cocoa flavor and the luxurious chocolate frosting create a deliciously rich experience that satisfies any sweet tooth.
- Family-friendly or kid-approved: This cake has broad appeal across age groups, making it a delightful addition to family dinners or playdates.
- Budget-friendly or ingredient flexibility: Most of the ingredients are pantry staples, and you can easily modify it to fit dietary preferences without sacrificing flavor.
Your Guide to Making Denver Chocolate Sheet Cake at Home
Making this delectable Denver Chocolate Sheet Cake is a breeze! You’ll only need a few essential tools such as a mixing bowl, measuring cups, and a baking pan. Prepare for a joyful baking adventure that typically takes around 30 minutes, plus an additional time for cooling and frosting your beautiful cake.
Ingredients
- All-purpose flour (1 ¾ cups): Provides the structure for the cake; you can substitute with gluten-free flour to make it gluten-free.
- Granulated sugar (2 cups): Sweetens the cake and helps achieve a lovely, moist texture.
- Unsweetened cocoa powder (¾ cup): The star flavor that gives the cake its chocolatey essence.
- Baking soda (1 ½ teaspoons): Helps the cake rise; ensure it’s fresh for the best results.
- Salt (1 teaspoon): Enhances flavors and balances the sweetness.
- Vegetable oil (½ cup): Adds moisture; can be swapped for butter for richer flavor.
- Buttermilk (1 cup): Gives the cake its tender crumb; can be replaced with milk and lemon juice if you don’t have buttermilk on hand.
- Vanilla extract (2 teaspoons): Rounds out the flavor profile beautifully.
- Eggs (2 large): Binds the ingredients together and adds richness.
Directions
-
Preheat Oven: Begin by preheating your oven to 350°F (175°C) while you prepare the batter. This ensures your cake bakes evenly and gives a lovely rise.
-
Mix Dry Ingredients: In a large mixing bowl, whisk together the flour, sugar, cocoa powder, baking soda, and salt until well combined. The rich chocolate aroma will fill the air, igniting your excitement for what’s to come!
-
Add Wet Ingredients: Make a well in the center of your dry mixture and pour in the vegetable oil, buttermilk, vanilla extract, and eggs. Use a whisk or electric mixer on low speed to blend until just combined; don’t overmix—stop when the batter is smooth, and the moisture meets the dry ingredients.
-
Pour and Spread: Carefully pour the batter into a greased and floured 18×13-inch sheet pan, ensuring even distribution. The batter should look glossy and thick, shimmering as it settles into the pan.
-
Bake the Cake: Place the sheet pan in the preheated oven and bake for 25 to 30 minutes, or until a toothpick inserted in the center comes out clean. The cake will rise beautifully, and the top should have a delicate crackle.
-
Cool and Frost: Once baked, remove from the oven and allow to cool in the pan for about 15 minutes before transferring it to a wire rack. While it cools, prepare your favorite chocolate frosting, spreading it generously over the top of the cake once it’s completely cooled.
-
Serve and Enjoy: Cut into squares and serve! Enjoy the rich chocolate flavor and the satisfied smiles from friends and family as they dig into this homemade delight.
What to Serve With Denver Chocolate Sheet Cake
This cake pairs beautifully with a variety of accompaniments that enhance its flavor and texture. For a classic twist, serve it warm with a scoop of vanilla ice cream—the creamy vanilla contrasts perfectly with the rich chocolate, creating a dessert experience that’s out of this world. You could also pair it with fresh berries, such as strawberries or raspberries, whose tartness complements the sweetness of the cake.
Another delightful option is to enjoy the cake with a pot of freshly brewed coffee or espresso. The warm bitterness of the coffee beautifully balances the sweetness of the chocolate, making for a refined dessert experience. If you’re looking for a lighter pairing, whipped cream topped with a dusting of cocoa powder or a sprinkle of powdered sugar can add a lovely finishing touch to each plate.
Pro Tips for the Best Denver Chocolate Sheet Cake
Nailing your Denver Chocolate Sheet Cake is all about technique! Being aware of a few tips can make a big difference in your baking experience.
- Ingredient swaps: If you need to make it gluten-free, simply use a gluten-free flour mix for the all-purpose flour without affecting taste.
- Spice adjustments: Consider adding a teaspoon of instant coffee to the batter to intensify the chocolate flavor further and create a rich depth!
- Equipment advice: Make sure your sheet pan is well greased and floured to ensure easy cake removal.
- Storage tips: Store leftovers in an airtight container at room temperature for up to 3 days or in the fridge for up to a week.
- Mistakes to avoid: Be careful not to overmix the batter; this can result in a dense cake. Stick to the just-mixed texture for a light, fluffy result.
Variations & Add-Ins
If you want to customize your Denver Chocolate Sheet Cake, the possibilities are endless! Here are a few variations to try:
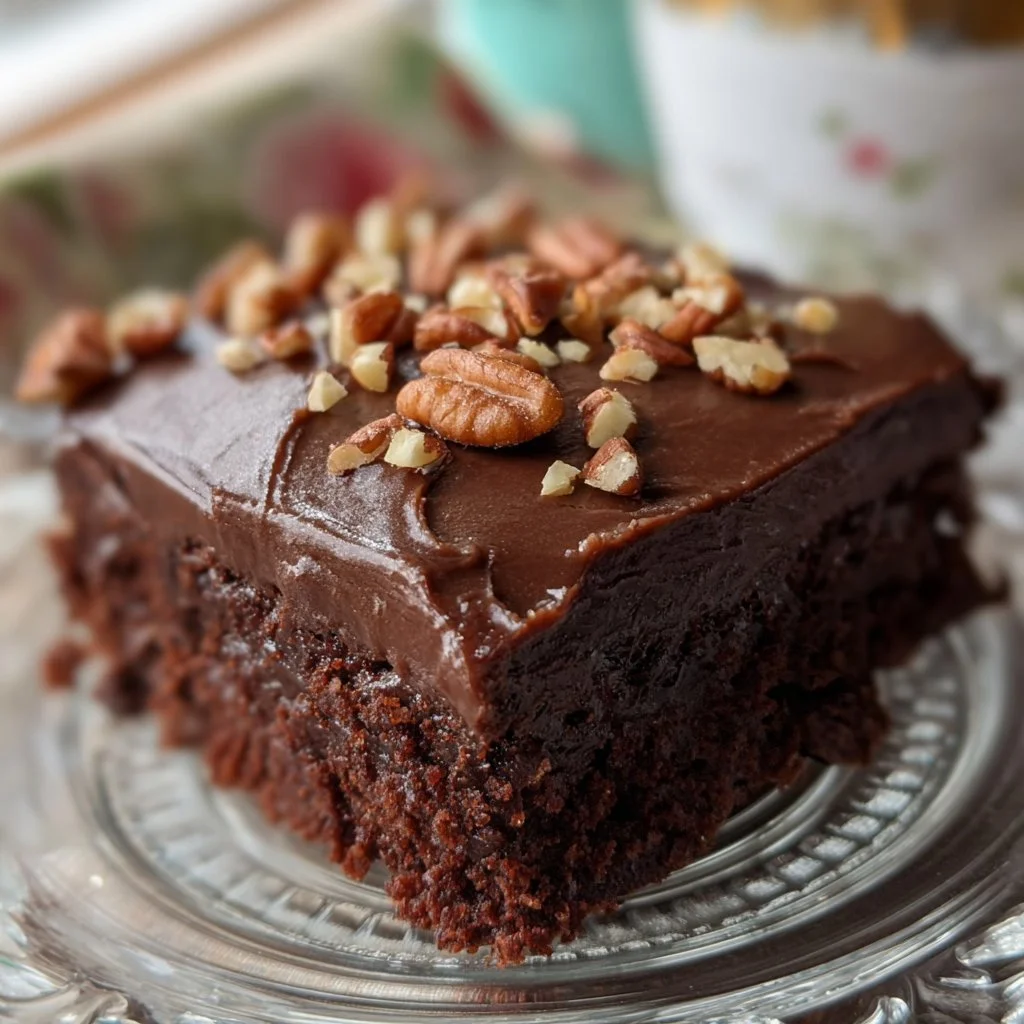
- Nutty Chocolate Sheet Cake: Fold in chopped walnuts or pecans into the batter before baking for a delightful crunch.
- Mint Chocolate Delight: Add a few drops of peppermint extract to the batter and frosting for a refreshing minty twist!
- Chocolate Chip Surprise: Mix in some semi-sweet chocolate chips for added gooeyness and bursts of flavor throughout the cake.
Kid-Friendly Version
If you have little ones who are eager to pitch in or are a bit picky about flavors, here’s a kid-friendly version of the Denver Chocolate Sheet Cake for you. You might consider reducing the sugar slightly to eliminate overpowering sweetness and using a lighter frosting like whipped cream or a cream cheese frosting instead of traditional chocolate frosting. Also, inviting the kids to decorate the cake with colorful sprinkles or fresh fruit adds a fun twist that makes them feel involved and excited about dessert.
Storing and Reheating Tips
If you’re fortunate enough to have leftovers (which is rare), proper storage will help maintain the cake’s delectable flavor and texture. To store, place your cake in an airtight container or wrap it tightly in plastic wrap to prevent it from drying out. When stored correctly at room temperature, the cake will stay fresh for about 3 days, while refrigeration can extend its shelf life to a week.
When it comes to reheating, the preferred method is to warm individual slices in the microwave for about 10-15 seconds—just enough to achieve that soft, ooey-gooey texture. Alternatively, you can place a slice in the air fryer at low temperature for about 3-5 minutes to replicate that fresh-out-of-the-oven warmth. For long-term storage, slice the cake and place it in a freezer-safe container; it can be frozen for up to 3 months. Thaw overnight in the refrigerator before serving again to maintain its moistness and flavor.
FAQs
Q: Can I make this cake ahead of time?
Absolutely! This cake holds up beautifully. You can bake it a day ahead, store it in an airtight container, and frost it right before serving for optimum freshness.
Q: Can I substitute the buttermilk?
Yes! If you don’t have buttermilk on hand, simply mix one tablespoon of lemon juice or white vinegar with enough milk to make a cup. Allow it to sit for a few minutes before adding it to your batter.
Q: Can I freeze the Denver Chocolate Sheet Cake?
Definitely! Just be sure to let the cake cool completely before wrapping it tightly and placing it in the freezer. When you’re ready to enjoy it, simply thaw and frost if desired.
Q: How can I adjust sugar for dietary restrictions?
If you’re looking to cut down on sugar, consider using a sugar substitute suitable for baking or reducing the sugar content by 20%. Be mindful of taste and texture changes when altering ingredients.
Q: What should I do if my cake is too dense?
This could be due to overmixing or adding too much flour. For future bakes, ensure you mix just until combined and use the right measuring technique to avoid compacting flour.
Conclusion
The Denver Chocolate Sheet Cake is more than just a dessert; it’s an experience of love and laughter, perfect for bringing family and friends together. Its simplicity, combined with the rich chocolate flavor, makes it a go-to recipe for any occasion. I hope you’ll give it a try and let the aroma of freshly baked chocolate fill your home. Try it tonight and let me know how it turned out!

Denver Chocolate Sheet Cake

A rich and moist chocolate sheet cake that’s a family favorite, perfect for gatherings and celebrations.
- Prep Time: 15 minutes
- Cook Time: 30 minutes
- Total Time: 45 minutes
- Yield: 12 servings 1x
- Category: Dessert
- Method: Baking
- Cuisine: American
- Diet: Vegetarian
Ingredients
- 1 ¾ cups all-purpose flour
- 2 cups granulated sugar
- ¾ cup unsweetened cocoa powder
- 1 ½ teaspoons baking soda
- 1 teaspoon salt
- ½ cup vegetable oil
- 1 cup buttermilk
- 2 teaspoons vanilla extract
- 2 large eggs
Instructions
- Preheat your oven to 350°F (175°C).
- In a large mixing bowl, whisk together the flour, sugar, cocoa powder, baking soda, and salt.
- Add vegetable oil, buttermilk, vanilla extract, and eggs to the dry mixture and mix until just combined.
- Pour the batter into a greased and floured 18×13 inch sheet pan.
- Bake for 25 to 30 minutes, or until a toothpick comes out clean.
- Allow the cake to cool for 15 minutes in the pan, then transfer to a wire rack.
- Frost the cooled cake with your favorite chocolate frosting.
- Cut into squares and serve.
Notes
For a lighter version, consider using whipped cream or cream cheese frosting.
Nutrition
- Serving Size: 1 serving
- Calories: 350
- Sugar: 30g
- Sodium: 300mg
- Fat: 15g
- Saturated Fat: 2g
- Unsaturated Fat: 10g
- Trans Fat: 0g
- Carbohydrates: 50g
- Fiber: 2g
- Protein: 4g
- Cholesterol: 60mg