
These gluten-free strawberry scones have pieces of fresh fruit inside the dough and mashed strawberries in the glaze. Those are separate quantities, so keep the small glaze portion aside before mixing. Lemon zest adds aroma without introducing a large amount of liquid to the dough.
Do not correct the dough too early
The mixture looks very dry before the chopped fruit is added. Give the strawberries a chance to become incorporated before deciding whether more yogurt is needed. Press the shaggy dough into a disc instead of kneading it smooth. Too much handling warms the butter and can make shaping harder.
Cold wedges keep their outline
Refrigerating the cut scones firms the butter before the oven. Transfer them to a room-temperature lined baking sheet with space around each wedge. Brushing with the yogurt-and-milk mixture finishes the tops without soaking them. Aim for golden surfaces and slightly darker edges, rather than waiting for a very hard crust.
A glaze that stays on top
Mash the berries thoroughly, then whisk in the sugar and vanilla. A thick glaze holds a more visible layer than a very loose one. Apply it only after the scones have cooled enough, and give it a little time to set. A warm scone can turn the glaze runny even when it started at the right consistency.
What changes overnight
The cut berries release moisture into the crumb as the scones stand, so their edges gradually soften. That is a storage effect rather than a reason to bake the batch until dry. For the clearest contrast between the crumb and outside edge, serve the scones on the day they are made.
Gluten-free ingredients and allergens
Use the listed flour weights and distinguish individual bread flours from a plain gluten-free blend. Follow each xanthan or psyllium instruction rather than changing binder amounts automatically. Check packaged ingredients and use clean tools and surfaces to limit gluten cross-contact. Other allergens are listed separately; gluten-free does not mean dairy-free or nut-free.
Contains: Milk. Check the flour blend for other allergens.
For packaged ingredient claims, see FDA gluten-free label guidance.
Serving and storage
Best on baking day. Store covered in a cool place for up to 2 days; refrigerate in a warm kitchen. The berry moisture softens the edges over time.
For another gluten-free idea, browse gluten-free almond croissant scones. You can also explore the DayTasty recipe collection.
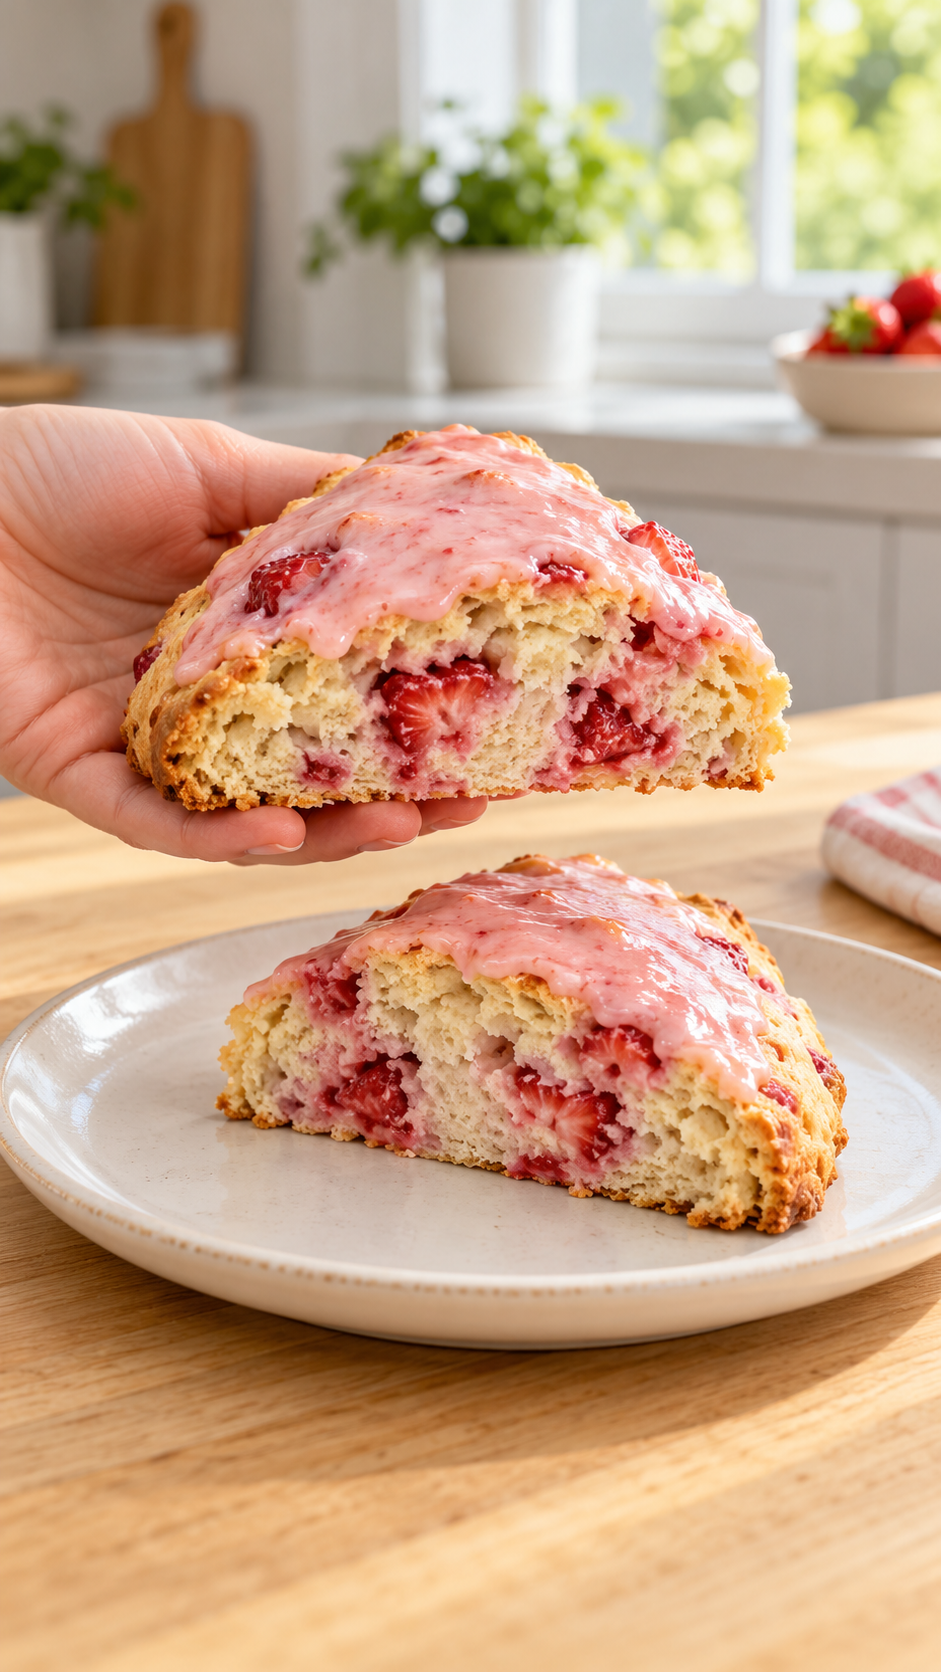

Gluten-Free Strawberry Scones
Ingredients
Method
- Rub the lemon zest into the sugar. Mix in flour, baking powder, xanthan and salt. Rub in the cold butter, leaving a few pea-size pieces.
- Stir in the cold yogurt and vanilla. The mixture will still look dry. Add the chopped strawberries and mix gently until most flour is hydrated; the dough should remain shaggy.
- Tip onto a lightly floured surface and press together without a long knead. Add only a little extra yogurt if it cannot hold together, or a little flour if excessively sticky. Press to a 7-inch disc about 1 inch thick and cut into eight wedges. Cover on a lined tray and refrigerate at least 20 minutes.
- Heat a conventional oven to 400°F / 200°C. Place the chilled wedges on a fresh lined baking tray with generous gaps. Mix the brushing yogurt and milk and brush over the tops.
- Bake 20–22 minutes, until golden with deeper-colored edges. Rest 5–10 minutes on the tray, then transfer to a rack and cool until barely warm or at room temperature.
- Mash the glaze strawberries and whisk with powdered sugar and vanilla. Keep the glaze fairly thick; adjust with tiny amounts of berry mash or sugar only if needed. Spoon over cooled scones and allow 10–15 minutes to set.
Notes
Best on baking day. Store covered in a cool place for up to 2 days; refrigerate in a warm kitchen. The berry moisture softens the edges over time.
Contains: Milk. Check the flour blend for other allergens.
Use the specified flour and binder amounts. Check packaged ingredient labels and avoid gluten cross-contact.