The Magic of Peppermint Holiday Bars
The holidays are all about joy, gathering with loved ones, and, of course, indulging in delicious treats. Imagine walking into a warm kitchen, the aroma of sweet cream mingling with refreshing peppermint, instantly putting you in a celebratory mood. Peppermint Holiday Bars bring 12 easy, creamy, lush bites that are sure to be the star of your festive dessert table. With their stunning, vibrant red and green hues and a delightful texture that practically melts in your mouth, these bars are as pleasing to the eye as they are to the palate. Perfect for everything from weeknight family gatherings to elaborate holiday parties, they are a crowd-pleasing treat that invites you to indulge. So gather your ingredients, roll up your sleeves, and get ready to create something that will become a cherished holiday tradition!
What Are Peppermint Holiday Bars?
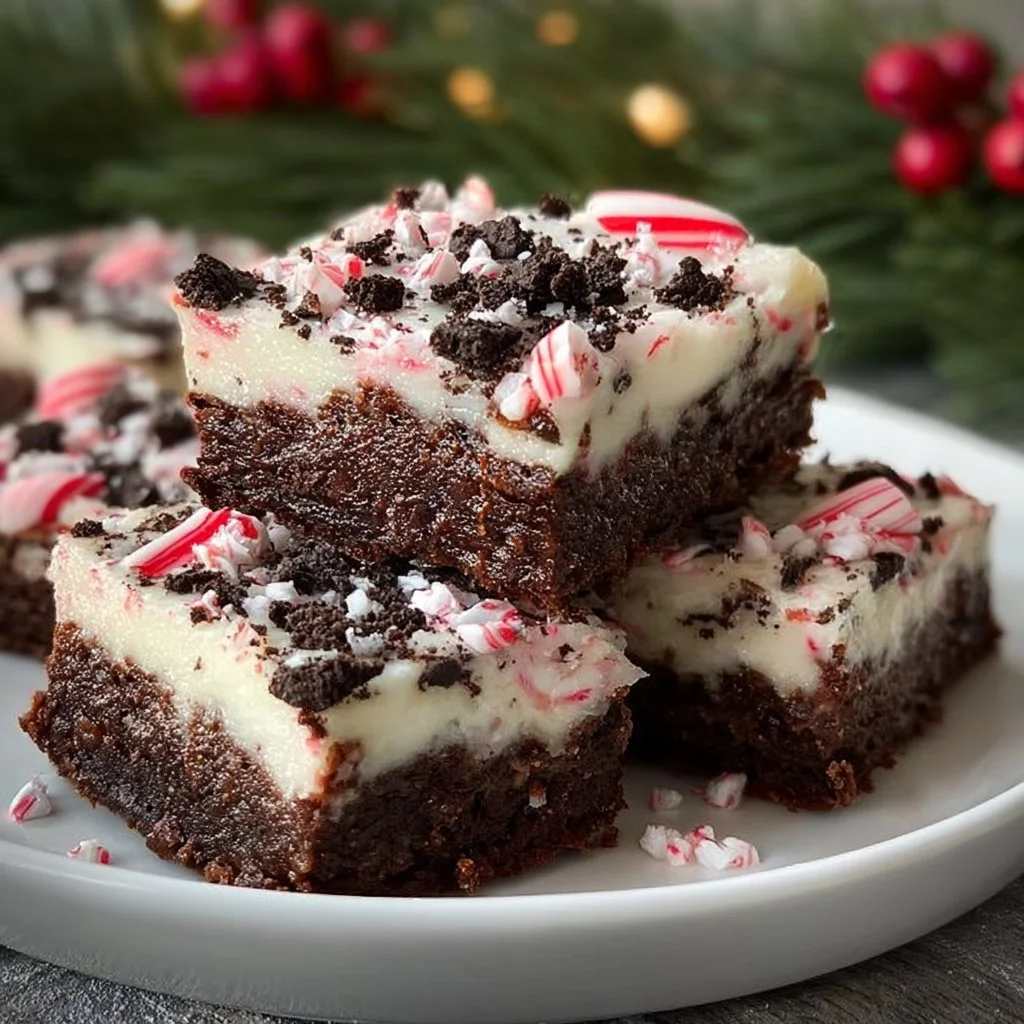
Peppermint Holiday Bars are a luscious dessert that combines creamy layers of sweetened cream cheese and rich white chocolate, topped with a hint of minty freshness. This delightful treat is often prepared during the holiday season, when flavors like peppermint and chocolate dominate our taste buds. The origins of this classic dessert can be traced back to seasonal cookie recipes, but these bars elevate the concept, transforming it into a creamy dessert that’s easily sliced and served. Unlike dense cakes or heavy pastries, these bars boast a light, creamy texture that’s both satisfying and refreshing—perfect for cutting through the often-rich flavors of holiday meals.
In terms of preparation, these bars can be made quickly with everyday kitchen tools, making them ideal for beginners or kitchen veterans alike. Whether you’re making them for a cozy family gathering or a festive office party, the process is straightforward, allowing you to focus on enjoying quality time with loved ones. Served cold or at room temperature, they retain their beautiful layers and flavors. Fun fact: the bright colors of peppermint and cream often evoke feelings of warmth and festivity, inviting everyone to savor each bite.
Why You’ll Love This Recipe
One of the best things about Peppermint Holiday Bars is their ease of preparation, making them a perfect choice for both experienced bakers and those still learning their way around the kitchen. The flavor complexity from the blend of creamy white chocolate and refreshing peppermint takes your taste buds on a delightful journey, all while keeping things simple and manageable. Plus, these bars are not only a treat for classically trained palates but family-friendly, meaning even picky eaters are likely to join in for another bite. Additionally, with a budget-friendly ingredient list, it’s easy to make a large batch without breaking the bank, ensuring everyone at your next gathering gets a taste of this festive delight.
- Ease of preparation: The recipe utilizes straightforward techniques, perfect for novice cooks.
- Flavor complexity: The blend of creaminess and mintiness adds layers of flavor that are super satisfying.
- Family-friendly or kid-approved: Its sweet and creamy profile makes it appealing to children and adults alike.
- Budget-friendly: Ingredients are commonly found and won’t strain your holiday budget, ideal for feeding larger groups.
- Ingredient flexibility: You can modify this recipe to suit dietary restrictions or personal preferences easily.
Your Guide to Making Peppermint Holiday Bars at Home
Making Peppermint Holiday Bars is as easy as pie—except it’s even less work! With a prep time of just about 30 minutes and a chilling time of a few hours, you’ll be able to whip up a batch that is ready for your next holiday gathering. All you need are basic kitchen tools like a mixing bowl, a baking dish, and an electric mixer. The delightful blend of flavors and textures will have your family and friends coming back for seconds, or even thirds!
Ingredients
- 1 cup of crushed graham crackers: Provides a crunchy, buttery base that contrasts beautifully with the creamy filling.
- ½ cup unsalted butter, melted: Binds the crust together and adds richness to the flavor.
- 8 oz cream cheese, softened: Contributes creaminess and a slight tang to balance the sweetness.
- 1 cup powdered sugar: Sweetens the cream cheese mixture and gives it a fluffy texture.
- 1 cup white chocolate chips: Enhances the dessert’s richness and helps create a smooth filling.
- 1 tsp peppermint extract: Infuses the bars with that unmistakable holiday flavor.
- Red and green food coloring (optional): Adds a festive flair that’s visually charming.
- Crushed peppermint candies: For garnish, providing an extra crunch and bright flavor.
Directions
-
Make the crust: In a medium bowl, mix crushed graham crackers with melted butter until well combined. The mixture should be crumbly yet hold together when pressed. Pour it into a greased 8×8-inch baking dish, spreading evenly across the bottom. Bake at 350°F (175°C) for 10 minutes, until lightly golden, then let it cool.
-
Prepare the filling: In a separate bowl, beat the softened cream cheese until smooth with an electric mixer. Gradually add powdered sugar and continue beating until fluffy. The texture should be creamy and thick, perfect for spreading.
-
Melt the chocolate: In a microwave-safe bowl, heat white chocolate chips in brief bursts of 30 seconds, stirring in between until fully melted and smooth. Be cautious not to overheat, as chocolate can burn easily. It should be lukewarm before adding it to the cream cheese mixture.
-
Combine the filling: Slowly fold the melted white chocolate and peppermint extract into the cream cheese and powdered sugar mixture until well incorporated. The mixture should be light and airy, with a delightful peppermint aroma.
-
Add color (optional): If using, divide the filling into two bowls. Add red food coloring to one bowl and green to the other, gently folding until you achieve your desired pastel shades.
-
Layer in the dish: Spread a layer of the red filling evenly over the cooled crust, followed by the green layer. Smooth the top with a spatula. Chill in the refrigerator for at least 2 hours, allowing the flavors to meld and the texture to firm up.
-
Serve and garnish: Once chilled, cut the bars into 12 squares. Top each square with crushed peppermint candies for a festive touch and serve cold. Enjoy the creamy texture and refreshing flavor as you celebrate the season!
Delicious Pairings for Peppermint Holiday Bars
These Peppermint Holiday Bars are best enjoyed when shared with loved ones, and their flavor pairs beautifully with hot beverages. Imagine savoring a bar alongside a warm cup of peppermint hot chocolate or a rich espresso; it’s a match made in holiday heaven! The creamy, sweet flavor of the bars complements the boldness of coffee or the richness of cocoa while the minty notes harmonize perfectly with the warmth of your drink.
- Peppermint hot cocoa: The chocolate flavor resonates well while the peppermint flavors tie both treats together.
- Espresso or coffee: A strong brew balances the sweetness and creamy texture, providing a sophisticated contrast.
- Vanilla ice cream: The creamy ice cream adds a different texture to the dessert experience and cools down the sweetness of the bars.
- Herbal tea: Mellow teas can cleanse the palate and enhance the overall experience with soothing undertones.
- Milk: A classic pairing with sweet treats that complements the rich and creamy aspects of the bars.
Top Tips for Perfecting Your Peppermint Holiday Bars
Techniques in baking are essential for executing a dish perfectly, and these Peppermint Holiday Bars are no exception. Attention to detail when melting chocolate and blending ingredients will greatly impact the final textures and flavors. The goal is to achieve that creamy consistency without any lumps while ensuring a perfectly firm crust that holds its shape.
- Ingredient swaps or upgrades: Swap regular cream cheese for a light version or use an alternative dairy-free cream cheese for a healthier or vegan option.
- Spice adjustments: If you love a bit of heat, consider adding a touch of cayenne for a unique twist that will excite your taste buds.
- Equipment advice: Using a food processor for crushing graham crackers will yield finely crushed crumbs for a better crust.
- Storage tips: Store the bars in an airtight container in the refrigerator to keep them fresh for up to a week.
- Mistakes to avoid: Ensure the cream cheese is at room temperature before mixing; this avoids lumps in the filling and provides a smooth blend.
Variations & Add-Ins
Looking to switch things up? Here are a few delightful variations of your Peppermint Holiday Bars that you can easily incorporate:
- Chocolate Peppermint Bars: Stir in cocoa powder into the crust and use chocolate chips instead of white chocolate for a deeper chocolate flavor.
- Mint Chip Bars: Fold in mini chocolate chips into the cream cheese filling for added textures and bursts of chocolate.
- Nutty Crunch Bars: Chop some pecans or walnuts and add them to the crust mixture for a delightful crunch that complements the creamy filling.
These variations can keep things fresh and exciting, encouraging you to make the dessert again in new ways that surprise and delight everyone.
Kid-Friendly Version
To cater to younger palates, you might want to adjust the peppermint flavor in these bars. Children tend to enjoy sweeter flavors without too much minty bite, so consider reducing the amount of peppermint extract or swapping it with vanilla extract for a milder flavor. You can also allow kids to help with the decorating using colorful sprinkles or even cookie crumbles for a fun visual feast they can get excited about.
When merging holiday favorites with kid-friendly elements, you’ll ensure that these Peppermint Holiday Bars are a hit among family gatherings.
Storing and Reheating Tips
To keep your Peppermint Holiday Bars fresh, store them in the refrigerator in an airtight container. They will maintain their delightful texture and flavors for up to a week; however, they are usually best enjoyed within the first few days. For optimal freshness, consider placing wax paper between layers if stacking them, which helps prevent sticking and keeps their charming appearance intact.
When it comes to reheating or serving these bars, they do not require any heating; their creamy texture is best enjoyed chilled. If you have leftovers and wish to savor them later, you can freeze individual bars in plastic wrap followed by a layer of foil. To thaw, simply place them back in the refrigerator for a few hours before serving.
FAQs
Can I prepare Peppermint Holiday Bars in advance?
Absolutely! These bars can be made a couple of days in advance, allowing the flavors to meld together beautifully in the refrigerator.
Are there any suitable substitutions for the ingredients?
You can swap cream cheese for vegan cream cheese or replace white chocolate with dark chocolate to suit tastes and dietary needs.
How long can I store these bars?
They can be stored in an airtight container in the refrigerator for up to one week or frozen for up to three months.
Can I change the flavor of the bars?
Yes! Feel free to add other extracts like vanilla or almond to mix things up, or even incorporate flavored cream cheese for an unexpected twist!
What’s the best way to cut these bars?
To ensure clean cuts, use a sharp knife and rinse it with warm water between cuts. This gives you nice, even squares perfect for serving!
Conclusion
Peppermint Holiday Bars bring 12 easy, creamy, lush bites that embody the festive spirit we all adore. Their inviting textures and delightful flavors ensure they’ll be a favorite at any gathering, whether a cozy family night or an extravagant dinner party. With their vibrant colors and heavenly taste, these bars are sure to bring cheer and sweetness to your holidays. Try it tonight and let me know how it turned out!
PrintPeppermint Holiday Bars

Indulge in these creamy Peppermint Holiday Bars, featuring layers of sweetened cream cheese and rich white chocolate, perfect for festive gatherings.
- Prep Time: 30 minutes
- Cook Time: 10 minutes
- Total Time: 140 minutes
- Yield: 12 servings 1x
- Category: Dessert
- Method: Chilling
- Cuisine: American
- Diet: Vegetarian
Ingredients
- 1 cup crushed graham crackers
- ½ cup unsalted butter, melted
- 8 oz cream cheese, softened
- 1 cup powdered sugar
- 1 cup white chocolate chips
- 1 tsp peppermint extract
- Red and green food coloring (optional)
- Crushed peppermint candies (for garnish)
Instructions
- Make the crust: Mix crushed graham crackers with melted butter until combined. Press into a greased 8×8-inch baking dish and bake at 350°F (175°C) for 10 minutes. Let cool.
- Prepare the filling: Beat softened cream cheese until smooth, then gradually add powdered sugar and beat until fluffy.
- Melt the chocolate: Heat white chocolate chips in the microwave in bursts, stirring until smooth and lukewarm.
- Combine the filling: Fold melted white chocolate and peppermint extract into the cream cheese mixture until well incorporated.
- Add color (optional): Divide the filling, adding red food coloring to one half and green to the other. Fold gently until desired shades are achieved.
- Layer in the dish: Spread a layer of red filling over the cooled crust, followed by the green layer. Chill for at least 2 hours.
- Serve and garnish: Cut into squares and top each square with crushed peppermint candies. Enjoy!
Notes
Store in the refrigerator for up to a week. These bars can be made a few days in advance for best flavor.
Nutrition
- Serving Size: 1 bar
- Calories: 250
- Sugar: 20g
- Sodium: 150mg
- Fat: 12g
- Saturated Fat: 7g
- Unsaturated Fat: 3g
- Trans Fat: 0g
- Carbohydrates: 35g
- Fiber: 1g
- Protein: 3g
- Cholesterol: 25mg