Do you ever find yourself craving a sweet treat that’s not only delicious but also a delightful conversation starter? Enter the Starbucks Cake Pop Recipe! These little bites of joy are perfect for an afternoon snack, birthday parties, or any family gathering. With their vibrant colors and cute lollipop-like presentation, they’re as much a feast for the eyes as they are for the taste buds. Picture a rich cake mixture enveloped in a smooth candy coating, tantalizing your senses with each bite. The wonderful aroma fills your kitchen, creating a welcoming atmosphere that brings everyone together. Trust me; this easy-to-make recipe will become a delightful favorite in your home. Grab your aprons and let’s dive into this sweet adventure!
What Is Starbucks Cake Pop Recipe?
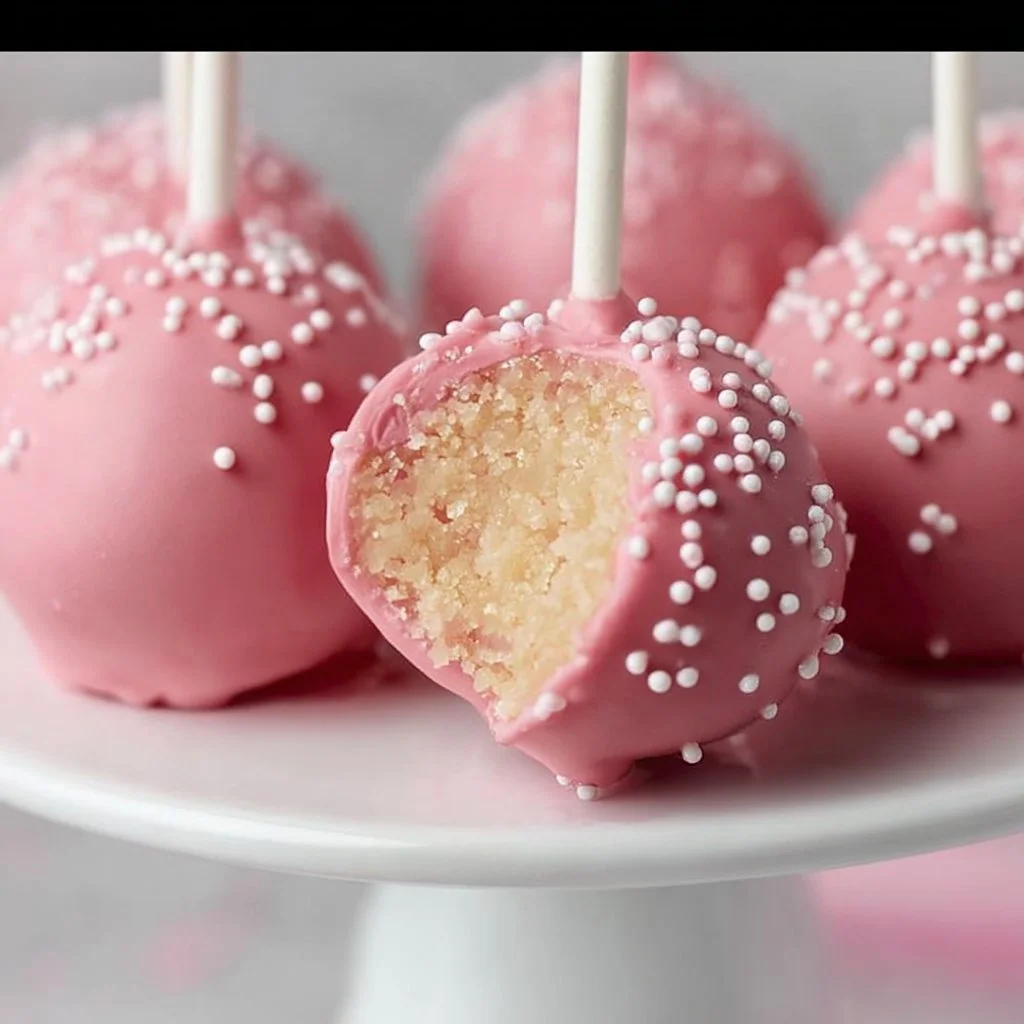
The Starbucks cake pop is a sweet treat that has gained a special place in coffee lovers’ hearts. Originally inspired by classic cake recipes, these petite pops are crafted from crumbled cake mixed with frosting, rolled into balls, and coated in chocolate or candy melts. They are versatile in flavor; you can experiment with vanilla, chocolate, red velvet, and even seasonal flavors to tantalize your taste buds. Despite their seemingly complex appearance, these treats are surprisingly simple to make and require minimal ingredients—perfect for both novice and experienced bakers.
Cake pops became a popular dessert option, not only for their delightful taste but also for their portability. Whether you’re heading to work, a picnic, or a family gathering, these little cake treats can be enjoyed on the go. Plus, they’re ideal for using up leftover cake or frosting, helping you reduce waste in the kitchen. Blend this hassle-free baking style with the flavor-enhancing charm of a slow cooker or an air fryer, and you have a recipe that’s not only easy but that ensures superb texture and moisture as well. They’re typically served at parties or as a sweet snack throughout the day, providing an enjoyable treat that pleases kids and adults alike.
Why You’ll Love This Starbucks Cake Pop Recipe
This Starbucks Cake Pop Recipe makes it incredibly simple to whip up a batch of these adorable treats without the need for specialized baking skills or equipment. You won’t need fancy techniques to create these charming pops; just combine your ingredients, roll, dip, and decorate! The overall preparation is quick, making it a manageable dessert option for weeknights or last-minute gatherings. Additionally, the flavors can easily be adjusted to fit your family’s preferences or dietary needs.
-
Ease of Preparation: With just a few nourishing ingredients, you can create your very own cake pops without any fuss. The clear instructions and minimal equipment make it a stress-free recipe, suitable for even the busiest weeknights.
-
Flavor Complexity: Beyond just a sweet treat, cake pops can embrace varying flavors—from classic chocolate to rich red velvet or even pumpkin spice for the fall. This versatility allows you to cater to different taste preferences, ensuring everyone leaves happy.
-
Family-Friendly or Kid-Approved: Cake pops are fun to make, and kids can join in on the process! Rolling, dipping, and decorating make for a lovely family activity that also transforms into an edible masterpiece.
-
Budget-Friendly or Ingredient Flexibility: You can easily swap ingredients based on what you have in your pantry, making this treat friendly to your wallet. Different cake mixes, frostings, or even chocolate coatings can create a unique spin on the classic treat.
How to Make Starbucks Cake Pop Recipe
Making Starbucks Cake Pops is a fun and rewarding culinary experience that the whole family can enjoy. The process involves mixing cake and frosting, shaping the mixture into balls, then dipping them into chocolate and decorating as desired. Let’s get started with the necessary tools and ingredients!
Quick Overview
To create these decadent cake pops, you’ll need minimal tools—just a mixing bowl, a baking tray, and some sticks for stabilizing the pops. Preparation typically takes about 20 minutes, with an additional hour for chilling and setting. This makes it a manageable dessert for both kids and parents to tackle.
Ingredients
-
1 box of cake mix: Any flavor works! This will serve as the base of your cake pops; opt for rich chocolate or classic vanilla for a traditional taste.
-
1 cup of frosting: Store-bought works perfectly; use the same flavor as your cake mix to unify taste profiles.
-
Candy coating or chocolate melts: Available in various colors and flavors; this will create the outer shell of your pop.
-
Cake pop sticks: These need to be sturdy enough to hold the pops without breaking.
-
Sprinkles or edible decorations: Optional, but they add a fun visual effect and make your cake pops even more delightful.
Directions
-
Bake the Cake: Preheat your oven according to the instructions on your cake mix box. Prepare a baking dish with non-stick spray or parchment paper. Bake according to package instructions until a toothpick inserted in the center comes out clean. The aroma of baking cake will fill your kitchen, enticing everyone nearby.
-
Cool and Crumble: Once baked, let the cake cool completely in the pan for at least 30 minutes. Once cooled, crumble the cake with your hands into a mixing bowl until it resembles fine crumbs. This step is essential for creating a cohesive cake pop mixture.
-
Mix in Frosting: Gradually add the frosting into the crumbled cake mixture. Start mixing with a fork and then use your hands to knead the mixture to a dough-like consistency. It should be moist but not overly wet, allowing you to roll it into balls effortlessly.
-
Shape Cake Balls: Using your hands, scoop out a small portion of the mixture (about 1 inch in diameter) and roll it into smooth balls. Place the balls onto a baking sheet lined with parchment paper. The smooth, rounded balls will soon look like delightful, colorful candies waiting to be coated.
-
Chill the Cake Balls: Place the baking sheet of cake balls in the refrigerator for about 30 minutes. This chilling process helps firm up the cake balls so they hold their shape when dipped in chocolate.
-
Melt the Chocolate: In a microwave-safe bowl, melt the candy coating according to package instructions. Stir until smooth, ensuring there are no lumps. The delightful smell of melted chocolate will fill the room, igniting your anticipations for the outcome.
-
Dip and Decorate: Dip each chilled cake ball into the melted chocolate, twirling to coat fully. Tap the stick on the edge of the bowl to remove any excess chocolate, then place the coated balls back onto the sheet. Add sprinkles or decorations immediately before the coating sets. The colorful sprinkles create a beautiful rainbow effect, turning your cake pops into little works of art!
What to Serve With Starbucks Cake Pop Recipe
Serving Starbucks Cake Pops can be as fun and imaginative as making them! These little treats work wonderfully as a standalone snack, perfect for parties or holiday gatherings. You can display them in stylish jars or holders, making them a statement piece on any dessert table.
-
Coffee or Tea: Pairing cake pops with a cup of freshly brewed coffee or tea brings out the rich flavors in both. The bitter notes from the coffee or the calming aroma of herbal tea complement the sweetness of the cake pop beautifully.
-
Ice Cream: For an indulgent experience, serve these treats alongside a scoop of your favorite ice cream. The contrast in temperature and texture between the smooth, cold ice cream and the chewy cake pop creates a delightful harmony.
-
Fruit Platters: Balancing the sweet cake pops with fresh fruit can add a refreshing element to your dessert table. The juicy, tart notes from berries or citrus fruits can elevate your cake pop experience!
Top Tips for Perfecting Starbucks Cake Pop Recipe
Mastering the art of cake pops does require some finesse, but these pro tips can ensure you achieve bakery-level bliss right in your kitchen. Whether you face difficulties with the coating or want to boost your cake pop game, these insights can guide you.
-
Ingredient Swaps or Upgrades: Don’t hesitate to experiment! Use different cake and frosting flavors or add-ins like chocolate chips or nuts to make your cake pops stand out.
-
Spice Adjustments: Add a pinch of cinnamon or espresso powder to enhance the flavor profile. These subtle additions can create an elevated taste that surprises your guests.
-
Equipment Advice: If you’re not a fan of working with melted chocolate, consider using candy melts for an even coating and multiple color options. A small dipping fork can also help facilitate an easier dipping process.
-
Storage Tips: Cake pops can be stored in the refrigerator for up to a week. Keeping them in an airtight container helps retain their moisture and freshness.
-
Mistakes to Avoid: Ensure the cake balls are chilled thoroughly before dipping. If they’re too warm, they may wobble or fall apart upon coating.
Variations & Add-Ins
While the classic cake pop is always a hit, you can take your creativity to new heights by experimenting with exciting variations!
-
Seasonal Flavors: Experiment with red velvet for Valentine’s Day or pumpkin spice for the fall! Substituting flavors can bring a fun seasonal twist to your cake pops.
-
Healthier Options: Consider using whole-grain flour and natural sweeteners like honey or maple syrup for a healthier alternative. Swap butter-based frosting with Greek yogurt for a lighter option.
Kid-Friendly Version
Making cake pops kid-friendly is a fantastic twist on the original recipe, allowing children to be involved in the creative process. Consider letting them pick their favorite flavors or helping them with the decoration stage. Bright, colorful toppings like sprinkles, crushed candies, or even fruit can keep things fun and engaging!
Encouraging children to express their creativity will result in personalized treats they’ll be proud to share. Allowing them to safely connect with baking through simple tasks can also instill a love for cooking in them.
Storing and Reheating Tips
Storing your Starbucks cake pops properly is essential for retaining their deliciousness. Once baked and decorated, cake pops can be kept in the refrigerator for up to a week. Make sure you place them in an airtight container to avoid drying out and to keep the flavors intact. If you plan to make them ahead of time, you can also freeze the uncoated cake balls for up to a month. Just remember to let them thaw in the refrigerator before dipping them in chocolate.
Reheating Tips
When it comes to reheating, generally, you don’t reheat cake pops since they are best enjoyed at room temperature. However, if you do have leftovers that you’d like to warm slightly, you can place them in the oven at 200°F for a few minutes to slightly soften the coating and make them extra yummy. Avoid using the microwave as it can disrupt the coating and make them overly mushy. Always remember to enjoy your cake pops fresh to appreciate their delightful texture and rich flavors!
FAQs
Can I make these cake pops gluten-free?
Absolutely! Use gluten-free cake mix and ensure your frosting is also gluten-free. With these substitutions, you can enjoy the same delicious taste without the gluten.
How far in advance can I make cake pops?
You can make and decorate them up to a week ahead of your event. Just store them in an airtight container in the refrigerator to keep them fresh!
What frosting works best?
While you can use any frosting, cream cheese frosting pairs beautifully with cakes like red velvet, while chocolate frosting complements chocolate cake. Choose based on your flavor profile!
Can I use leftover cake?
Definitely! Leftover cake from birthdays or holidays can be crumbled and transformed into cake pops, making it a great way to reduce waste while still enjoying a sweet treat.
How can I make them vegan?
Vegan cake mixes and frosting are widely available today. Just make sure to choose dairy-free chocolate for dipping as well, and you’ll have delicious cake pops that everyone can enjoy!
Conclusion
In conclusion, this Starbucks Cake Pop Recipe is a delightful way to create delicious treats that bring joy to any occasion. With an easy preparation process, customizable flavors, and the ability to involve the whole family, these little desserts are sure to be a hit. The vibrant colors and sweet flavors will satisfy both young and old, making them a great addition to your kitchen repertoire. So why not give it a go? Try it tonight and let me know how it turned out!
PrintStarbucks Cake Pop Recipe

Delicious and visually appealing cake pops inspired by Starbucks, perfect for any gathering.
- Prep Time: 20 minutes
- Cook Time: 30 minutes
- Total Time: 50 minutes
- Yield: 20 cake pops 1x
- Category: Dessert
- Method: Baking
- Cuisine: American
- Diet: Vegetarian
Ingredients
- 1 box of cake mix (any flavor)
- 1 cup of frosting (store-bought)
- Candy coating or chocolate melts
- Sturdy cake pop sticks
- Sprinkles or edible decorations (optional)
Instructions
- Preheat the oven according to cake mix instructions. Prepare a baking dish.
- Bake according to package instructions until a toothpick comes out clean.
- Let the cake cool in the pan for at least 30 minutes, then crumble into fine crumbs.
- Mix frosting into crumbs until dough-like consistency is formed.
- Scoop and roll the mixture into 1-inch balls and place on a baking sheet lined with parchment paper.
- Refrigerate for about 30 minutes to firm up.
- Melt the candy coating according to package instructions.
- Dip each cake ball into melted chocolate and decorate as desired. Let set on a baking sheet.
Notes
Experiment with different cake flavors, and involve kids in decorating for a fun activity.
Nutrition
- Serving Size: 1 cake pop
- Calories: 120
- Sugar: 10g
- Sodium: 60mg
- Fat: 5g
- Saturated Fat: 2g
- Unsaturated Fat: 3g
- Trans Fat: 0g
- Carbohydrates: 17g
- Fiber: 0g
- Protein: 1g
- Cholesterol: 10mg